LP—MSPM0G3507小车开发(PWM驱动两轮直流电机)
本文介绍了基于TIMSPM0的PWM电机控制配置方法。首先通过图形化界面配置4个GPIO输出口(zuo1/zuo2/you1/you2)和双通道PWM(TIMA1)。核心代码实现了左右电机PWM控制函数,支持正反转和停止功能。进一步封装了小车运动控制模块(car.c),包含直行、左右转和停止功能。主程序调用Go_Ahead()实现直行控制。系统基于M03507拓展板和TB6612电机驱动模块,完整
·
PWM介绍请直接看B站torris网课(【2025电赛】TI MSPM0快速入门课 - PWM_哔哩哔哩_bilibili),我们这里直接进行改编配置
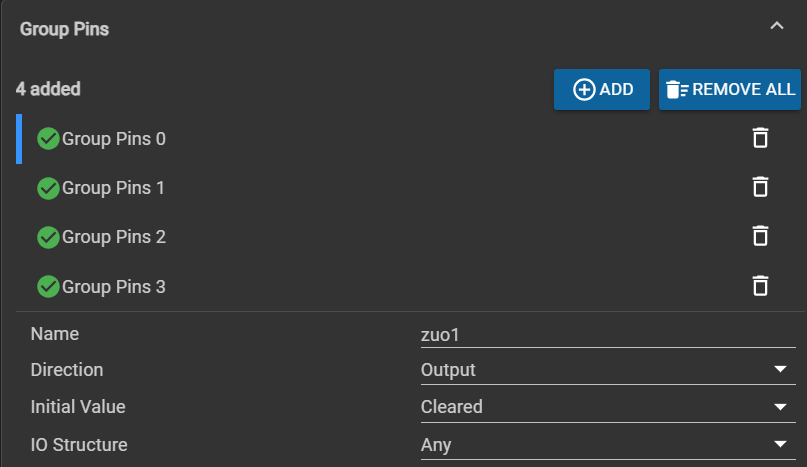
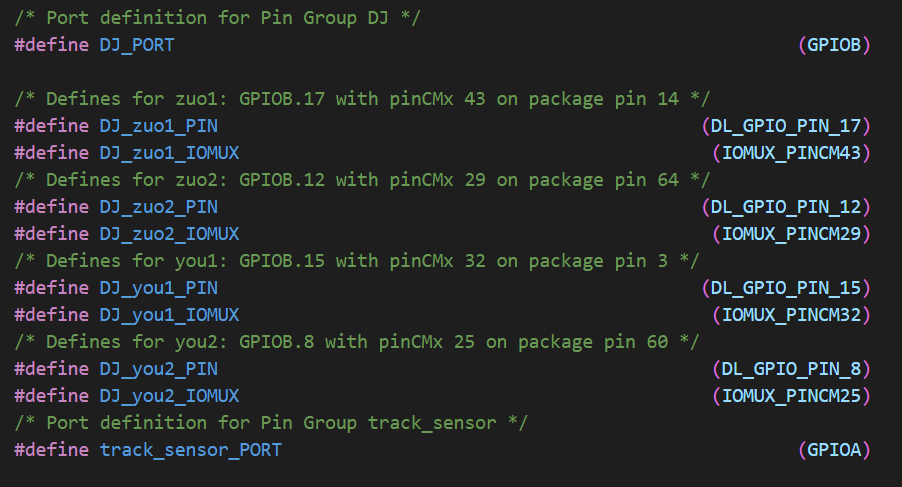
1.配置图形化界面,先在GPIO口中配置4个口,分别给左轮和右轮的电压输入。我这里命名为DJ(电机)

在下面的Grop Pins 中添加4个口:分别命名为zuo1、zuo2、you1、you2,设置为output(输出)
再选择对应的端口:


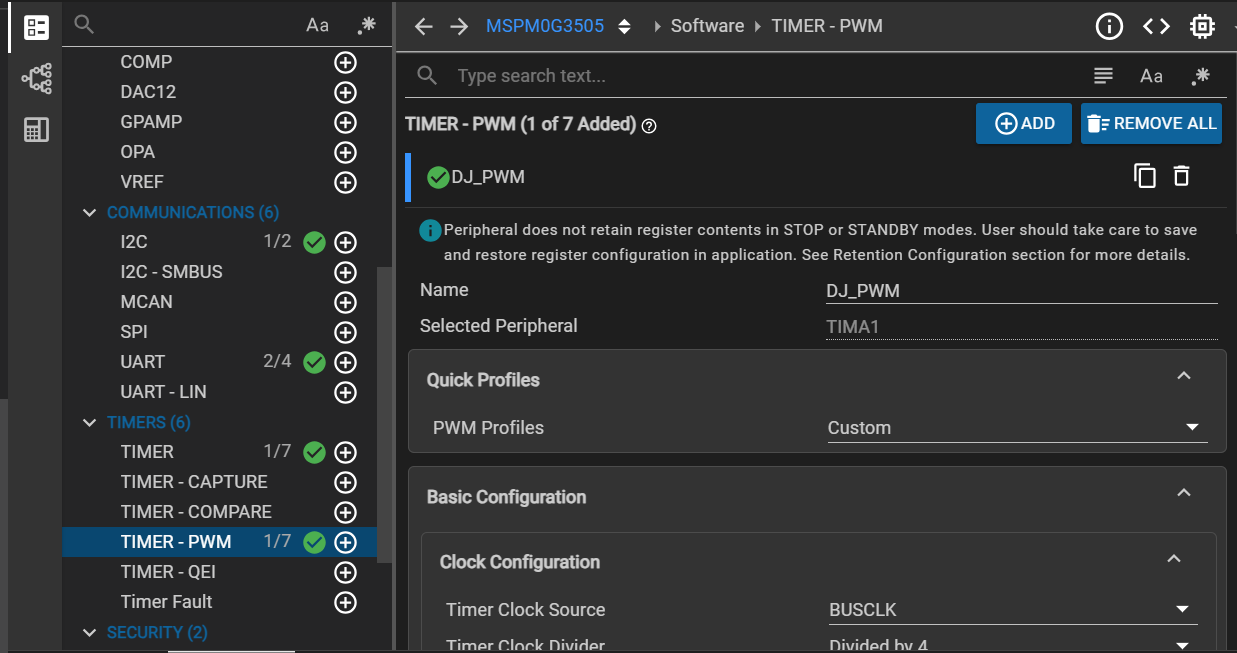
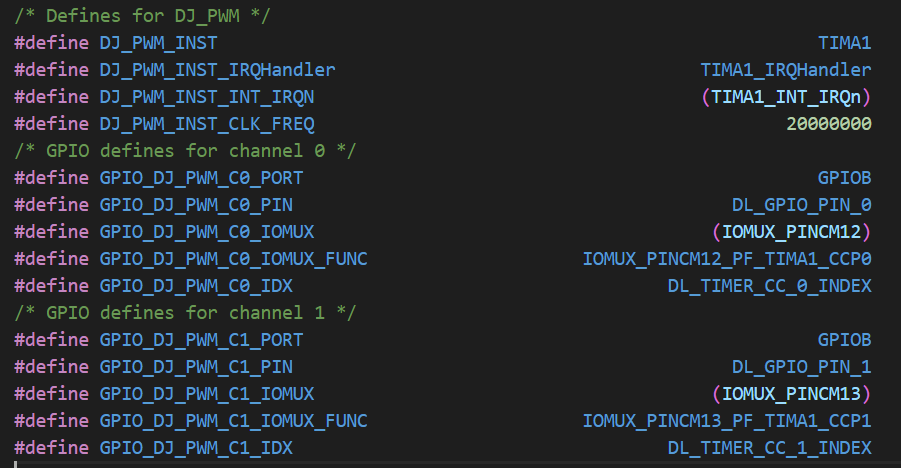
 2.接下来在图形化界面中配置PWM,选择TIMER-PWM,添加命名为DJ_PWM
设置时钟频率和分频
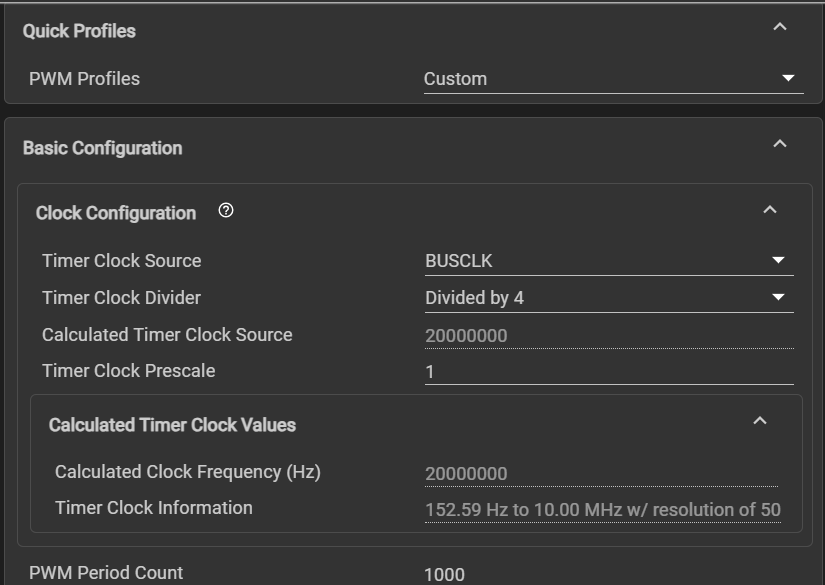
边缘向上计数,双通道

选择定时器(TIMA1)和端口
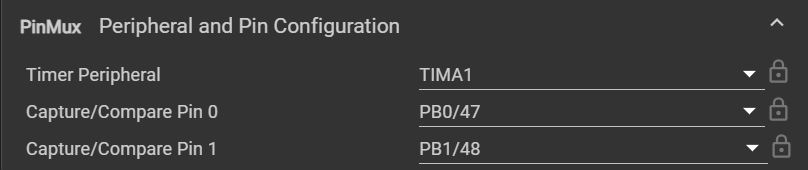
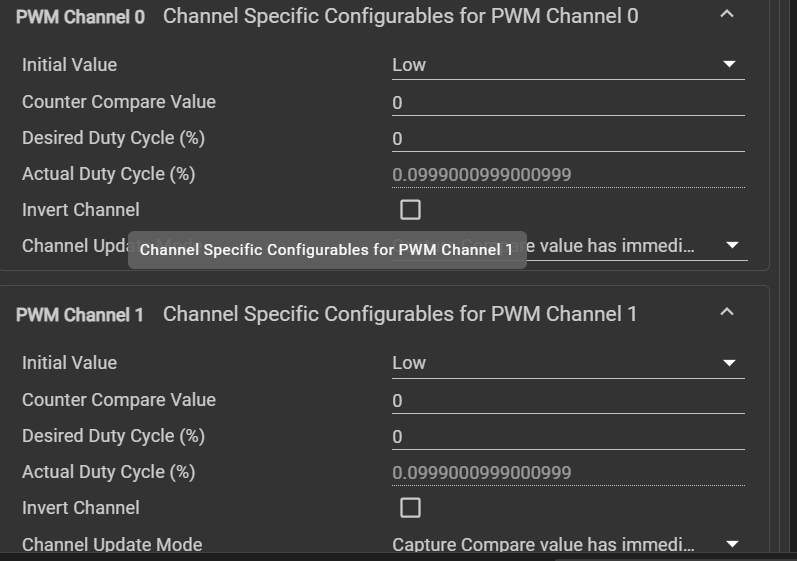
图像化界面就配置好了,上代码:
DJ.c文件
#include "ti_msp_dl_config.h"
#include "DJ.h"

void PWM_zuo_set(int count){
    if(count>0){
        DL_GPIO_setPins(DJ_PORT, DJ_zuo1_PIN);
        DL_GPIO_clearPins(DJ_PORT, DJ_zuo2_PIN);
        DL_TimerA_setCaptureCompareValue(DJ_PWM_INST, count, DL_TIMER_CC_0_INDEX);
    }else if(count<0){
        count=-count;
        DL_GPIO_setPins(DJ_PORT, DJ_zuo2_PIN);
        DL_GPIO_clearPins(DJ_PORT, DJ_zuo1_PIN);
        DL_TimerA_setCaptureCompareValue(DJ_PWM_INST, count, DL_TIMER_CC_0_INDEX);
    }else if(count==0){
        DL_GPIO_clearPins(DJ_PORT, DJ_zuo2_PIN);
        DL_GPIO_clearPins(DJ_PORT, DJ_zuo1_PIN);
    }
}

void PWM_you_set(int count){
    if(count>0){
        DL_GPIO_setPins(DJ_PORT, DJ_you1_PIN);
        DL_GPIO_clearPins(DJ_PORT, DJ_you2_PIN);
        DL_TimerA_setCaptureCompareValue(DJ_PWM_INST, count, DL_TIMER_CC_1_INDEX);
    }else if(count<0){
        count=-count;
        DL_GPIO_setPins(DJ_PORT, DJ_you2_PIN);
        DL_GPIO_clearPins(DJ_PORT, DJ_you1_PIN);
        DL_TimerA_setCaptureCompareValue(DJ_PWM_INST, count, DL_TIMER_CC_1_INDEX);
    }else if(count==0){
        DL_GPIO_clearPins(DJ_PORT, DJ_you1_PIN);
        DL_GPIO_clearPins(DJ_PORT, DJ_you2_PIN);
    }
}
DJ.h文件
#ifndef __DJ_H
#define __DJ_H

void PWM_zuo_set(int count);
void PWM_you_set(int count);

#endif
在主函数里面调用就可以实现功能了,我这里继续封装了一下:
car.c
#include "ti_msp_dl_config.h"
#include "DJ.h"                      //小车行驶控制模块
#include "car.h"

uint16_t L_speed=500;                 //设置小车左轮速度,满占空比为1000
uint16_t R_speed=500;                 //设置小车右轮速度,满占空比为1000

void Go_Ahead()	//直行
{
    PWM_zuo_set(L_speed);
    PWM_you_set(R_speed);
}

void Turn_Left()	//左转
{
    PWM_zuo_set(0);
    PWM_you_set(R_speed);
}
void Turn_Right()	//右转
{
    PWM_zuo_set(L_speed);
    PWM_you_set(0);

}

void Car_Stop()		//停
{
    PWM_zuo_set(0);
    PWM_you_set(0);
}
car.h
#ifndef __CAR_H
#define __CAR_H

void Turn_Right(void);
void Turn_Left(void);
void Go_Ahead(void);
void Car_Stop(void);

#endif
main.c
#include "ti_msp_dl_config.h"
#include "DJ.h"
#include "car.h"


int main(void)
{
    SYSCFG_DL_init();           //系统初始化

    while (1)
	{

            Go_Ahead();  //直行

    }
}
备注:我使用的是M03507的拓展板(红色),电机驱动还需要一个tb6612模块。
如果自己的名称和我的不一样,可以在下面查看(先编译)
![]()
源码上传到个人仓库了。感谢观看,不足之处,还望谅解。

智能硬件社区聚焦AI智能硬件技术生态,汇聚嵌入式AI、物联网硬件开发者,打造交流分享平台,同步全国赛事资讯、开展 OPC 核心人才招募,助力技术落地与开发者成长。
更多推荐


 12
12 0
0- 0


 已为社区贡献1条内容

所有评论(0)