【STM32单片机】飞翔的小鸟游戏-OLED
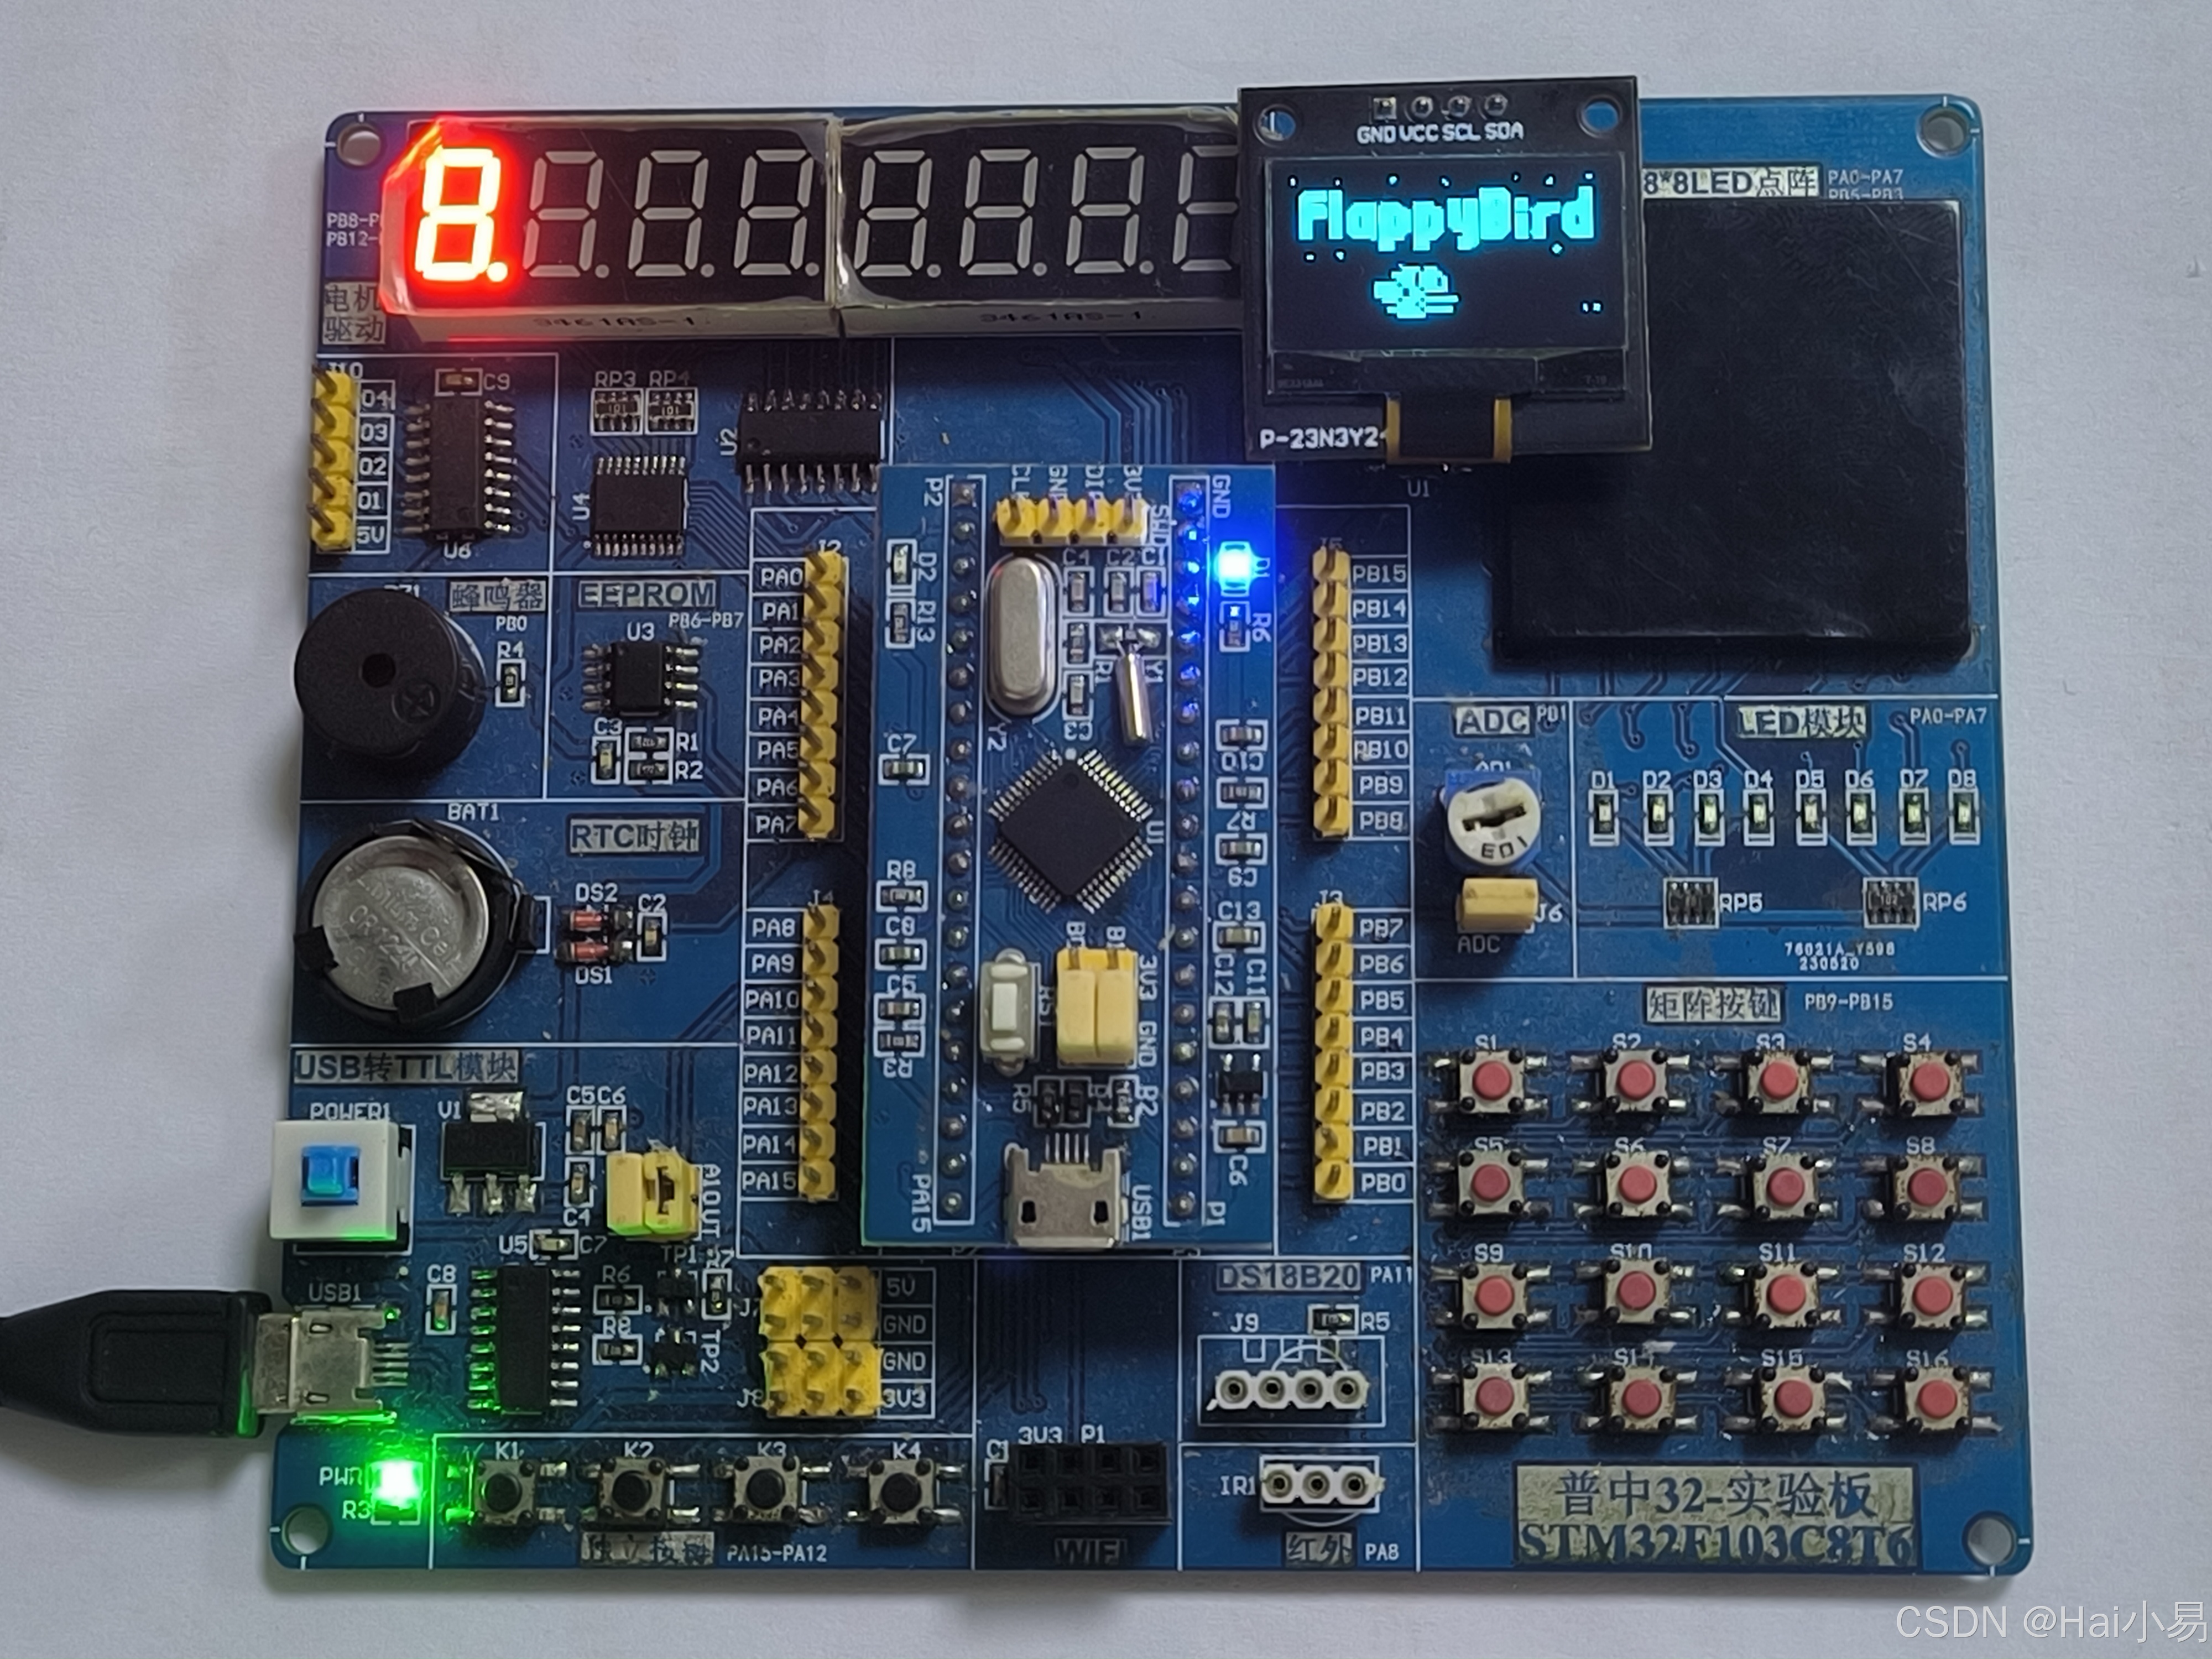
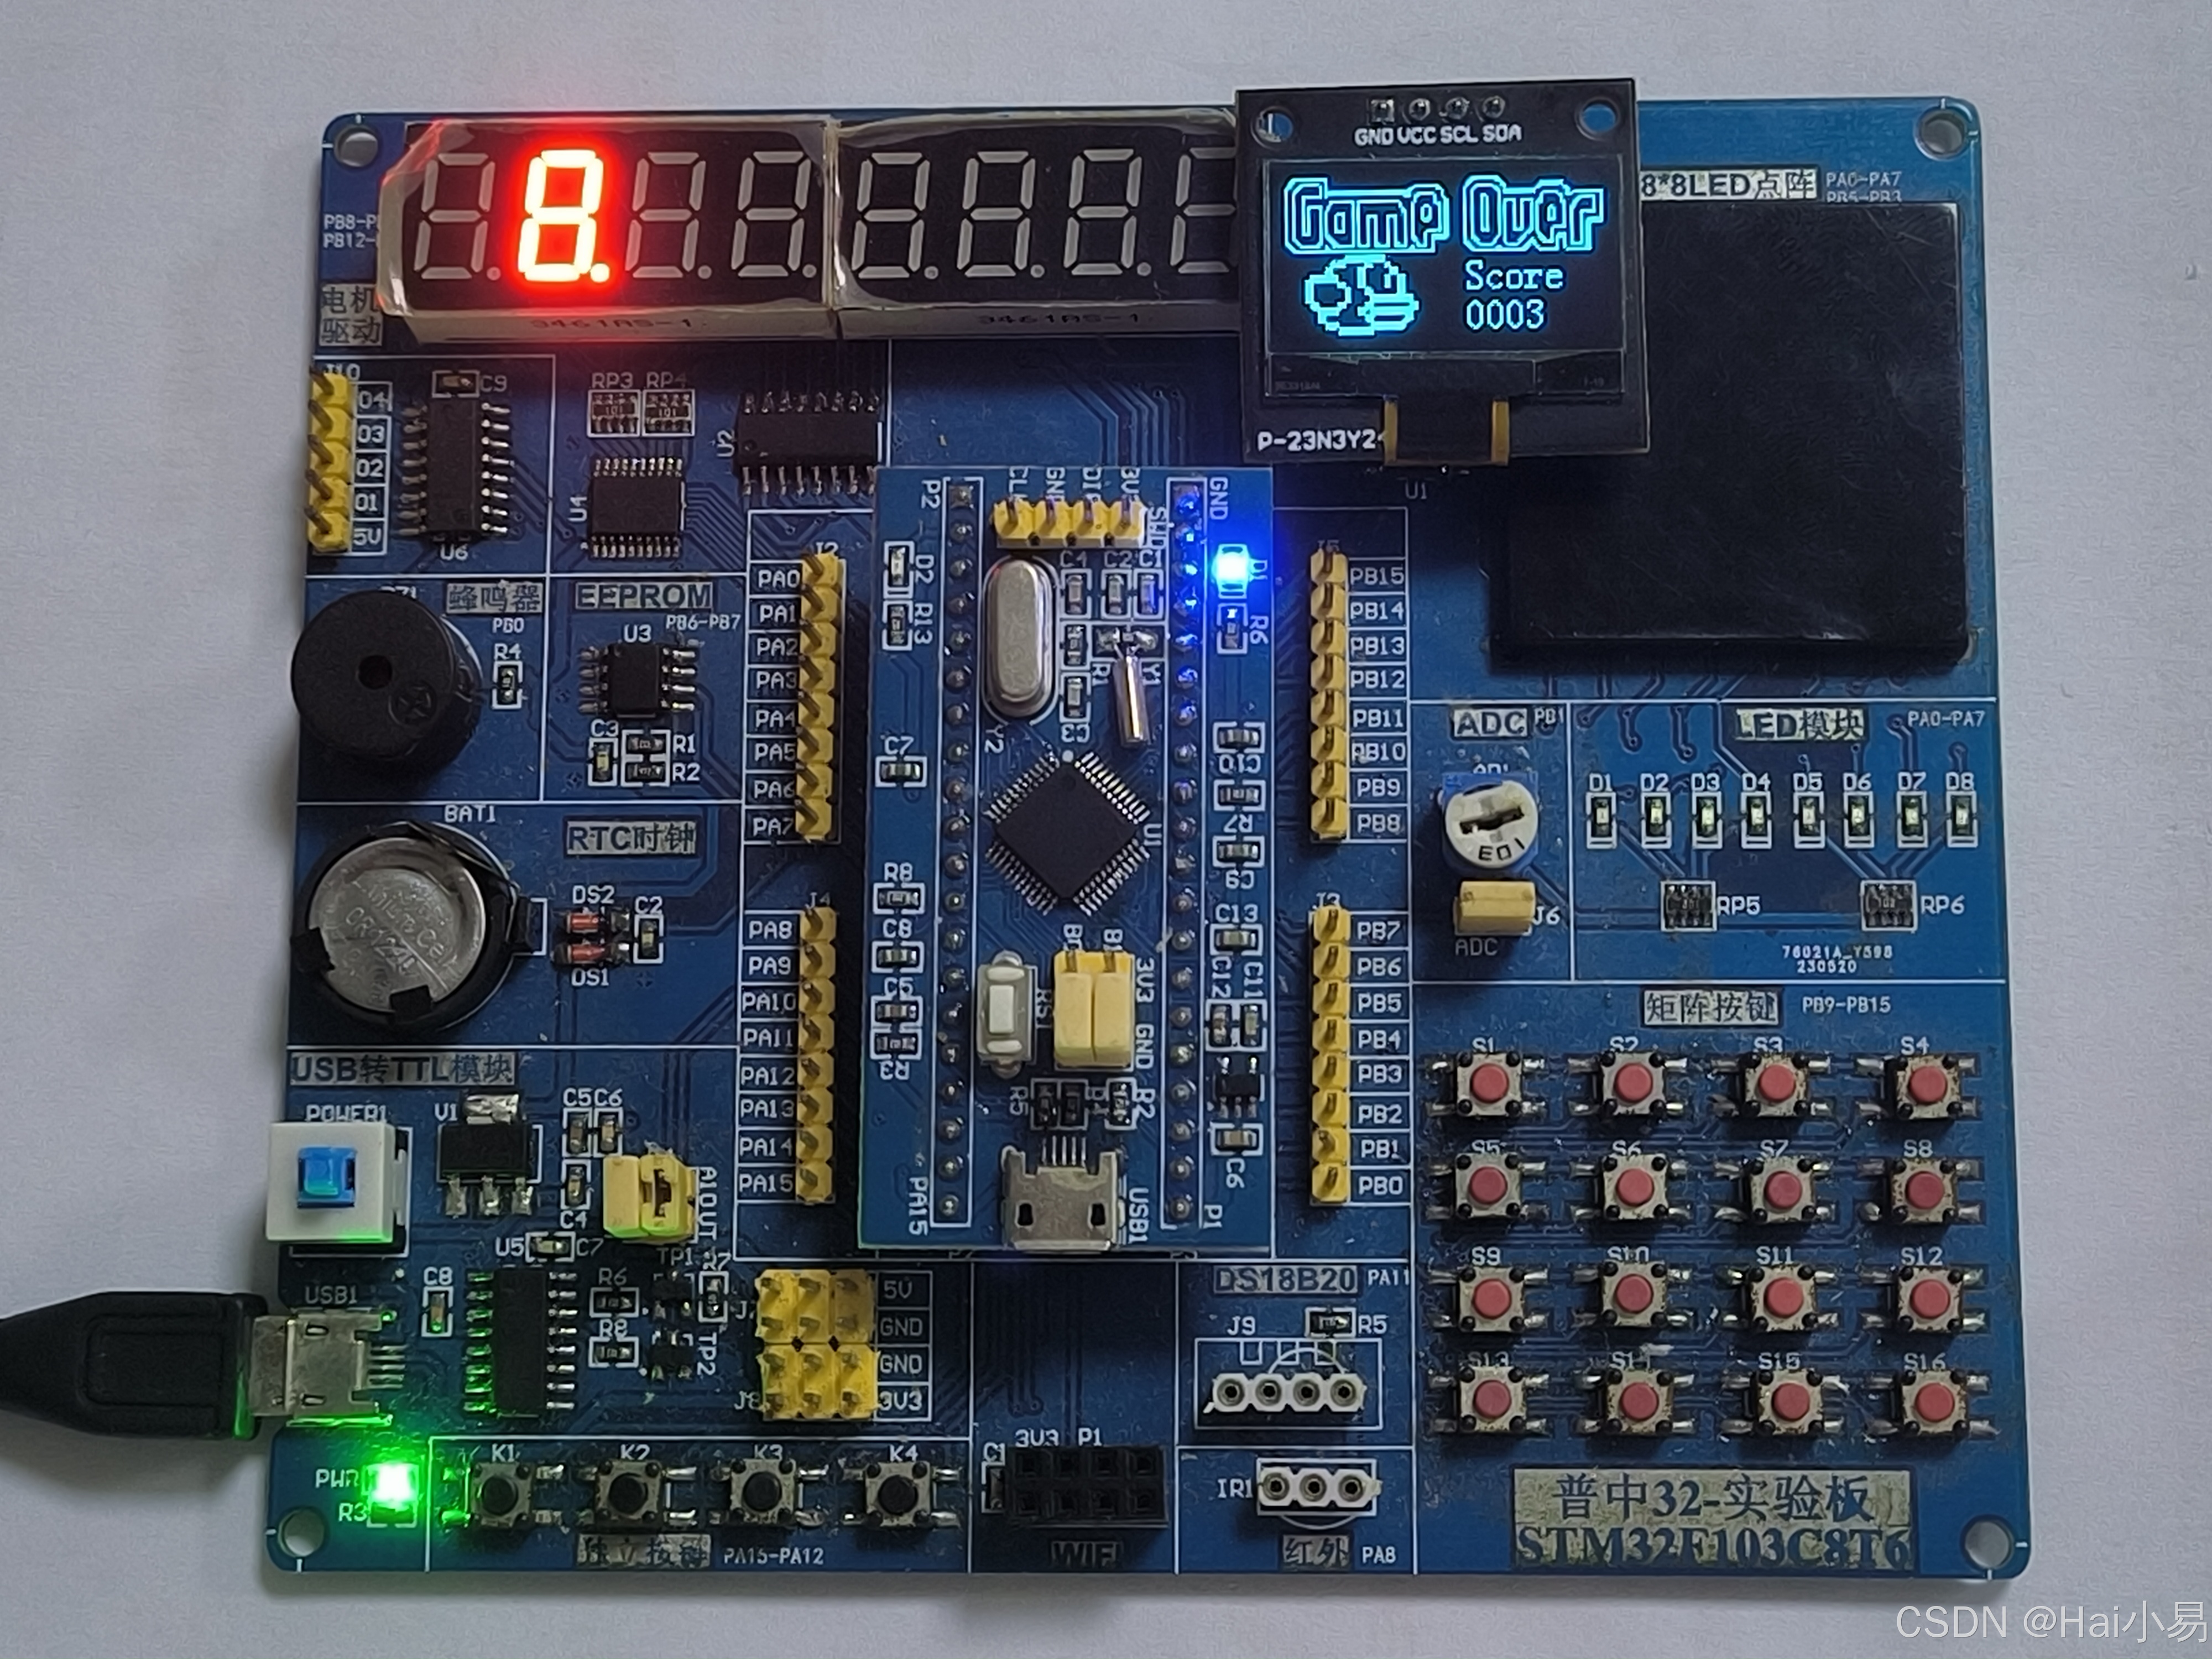
本项目采用STM32F103C8T6单片机控制器,使用IIC OLED模块、按键模块等。主要功能:系统运行后,系统运行后,OLED显示游戏界面,按下K1键游戏开始,按下K1键控制小鸟飞行,当通过障碍物得1分,否则游戏结束。
·
一、功能简介
本项目采用STM32F103C8T6单片机控制器,使用IIC OLED模块、按键模块等。
主要功能:
系统运行后,系统运行后,OLED显示游戏界面,按下K1键游戏开始,按下K1键控制小鸟飞行,当通过障碍物得1分,否则游戏结束。
二、软件设计
/*
作者:嗨小易(QQ技术交流群:570487280)

*/


int get_button_status()
{
	if(HAL_GPIO_ReadPin(button_GPIO_Port, button_Pin)==0) return 1;
	return 0;
}

void draw(){
	OLED_Clear();
	OLED_ShowNum(80, 0, score, 4, OLED_6X8);
	OLED_DrawRectangle(x1, 0, 10, y1, OLED_FILLED);
	OLED_DrawRectangle(x1-2, y1-6, 14, 6, OLED_FILLED);

	OLED_DrawRectangle(x1, y1+20, 10, 64-y1, OLED_FILLED);
	OLED_DrawRectangle(x1-2, y1+20, 14, 6, OLED_FILLED);

	OLED_DrawRectangle(x2, 0, 10, y2, OLED_FILLED);
	OLED_DrawRectangle(x2-2, y2-6, 14, 6, OLED_FILLED);

	OLED_DrawRectangle(x2, y2+20, 10, 64-y2, OLED_FILLED);
	OLED_DrawRectangle(x2-2, y2+20, 14, 6, OLED_FILLED);

	OLED_ShowImage(20, bird_y, 11, 8, bird);


	OLED_Update();
}
/* USER CODE END 0 */

/**
  * @brief  The application entry point.
  * @retval int
  */
int main(void)
{
  /* USER CODE BEGIN 1 */
	unsigned char is_fail = 0;
	x1 = 128;
	x2 = 192;
	y1 = rand()% 42 + 1;
	y2 = rand()% 42 + 1;

	bs = 32;
	bird_y = 10;
	score = 0;
  /* USER CODE END 1 */

  /* MCU Configuration--------------------------------------------------------*/

  /* Reset of all peripherals, Initializes the Flash interface and the Systick. */
  HAL_Init();

  /* USER CODE BEGIN Init */

  /* USER CODE END Init */

  /* Configure the system clock */
  SystemClock_Config();

  /* USER CODE BEGIN SysInit */

  /* USER CODE END SysInit */

  /* Initialize all configured peripherals */
  MX_GPIO_Init();
  /* USER CODE BEGIN 2 */
  OLED_Init();
  /* USER CODE END 2 */

  /* Infinite loop */
  /* USER CODE BEGIN WHILE */
	OLED_ShowImage(0, 0, 128, 64, cover);
	OLED_Update();
	while(get_button_status() == 0){}
  while (1)
  {
		if (is_fail == 0)
		{

			if(get_button_status() == 1)
			{
				bs = 32;
			}

			x1 = x1 - 2;
			x2 = x2 - 2;
			bs = bs-5;
			bird_y = bird_y - bs / 10;

			draw();

			if(bird_y < 0){
				bird_y = 0;
			}
			if(bird_y > 64){
			 is_fail = 1;
			}

			if(x1==-10){
				x1 = 128;
				y1 = rand()% 42 + 1;
			}
			if(x2==-10){
				x2 = 128;
				y2 = rand()% 42 + 1;
			}
			if (x1 >= 20 && x1 <= 20 + 11) {
				if(bird_y < y1 || bird_y+8 > y1+20){
					is_fail = 1;
				}
			}
			if (x2 >= 20 && x2 <= 20 + 11) {
				if(bird_y < y2 || bird_y+8 > y2+20){
					is_fail = 1;
				}
			}

			if(x1==16 || x2==16){
				score++;
			}

			HAL_Delay(30);
		}

		if (is_fail == 1)
		{
			HAL_Delay(500);
			OLED_Clear();
			OLED_ShowImage(0, 0, 128, 32, game_over);
			OLED_ShowImage(8, 32, 45, 32, image);
			OLED_ShowString(72, 32, "Score", OLED_8X16);
			OLED_ShowNum(72, 48, score, 4, OLED_8X16);

			OLED_Update();
			HAL_Delay(2000);
			while(get_button_status() == 0);
			is_fail = 0;

			x1 = 128;
			x2 = 192;

			y1 = rand()% 42 + 1;
			y2 = rand()% 42 + 1;

			bs = 32;
			bird_y = 50;
			score = 0;

		}
    /* USER CODE END WHILE */

    /* USER CODE BEGIN 3 */
  }
  /* USER CODE END 3 */
}

/**
  * @brief System Clock Configuration
  * @retval None
  */
void SystemClock_Config(void)
{
  RCC_OscInitTypeDef RCC_OscInitStruct = {0};
  RCC_ClkInitTypeDef RCC_ClkInitStruct = {0};

  /** Initializes the RCC Oscillators according to the specified parameters
  * in the RCC_OscInitTypeDef structure.
  */
  RCC_OscInitStruct.OscillatorType = RCC_OSCILLATORTYPE_HSE;
  RCC_OscInitStruct.HSEState = RCC_HSE_ON;
  RCC_OscInitStruct.HSEPredivValue = RCC_HSE_PREDIV_DIV1;
  RCC_OscInitStruct.HSIState = RCC_HSI_ON;
  RCC_OscInitStruct.PLL.PLLState = RCC_PLL_ON;
  RCC_OscInitStruct.PLL.PLLSource = RCC_PLLSOURCE_HSE;
  RCC_OscInitStruct.PLL.PLLMUL = RCC_PLL_MUL9;
  if (HAL_RCC_OscConfig(&RCC_OscInitStruct) != HAL_OK)
  {
    Error_Handler();
  }

  /** Initializes the CPU, AHB and APB buses clocks
  */
  RCC_ClkInitStruct.ClockType = RCC_CLOCKTYPE_HCLK|RCC_CLOCKTYPE_SYSCLK
                              |RCC_CLOCKTYPE_PCLK1|RCC_CLOCKTYPE_PCLK2;
  RCC_ClkInitStruct.SYSCLKSource = RCC_SYSCLKSOURCE_PLLCLK;
  RCC_ClkInitStruct.AHBCLKDivider = RCC_SYSCLK_DIV1;
  RCC_ClkInitStruct.APB1CLKDivider = RCC_HCLK_DIV2;
  RCC_ClkInitStruct.APB2CLKDivider = RCC_HCLK_DIV1;

  if (HAL_RCC_ClockConfig(&RCC_ClkInitStruct, FLASH_LATENCY_2) != HAL_OK)
  {
    Error_Handler();
  }
}

/**
  * @brief GPIO Initialization Function
  * @param None
  * @retval None
  */
static void MX_GPIO_Init(void)
{
  GPIO_InitTypeDef GPIO_InitStruct = {0};
/* USER CODE BEGIN MX_GPIO_Init_1 */
/* USER CODE END MX_GPIO_Init_1 */

  /* GPIO Ports Clock Enable */
  __HAL_RCC_GPIOA_CLK_ENABLE();
  __HAL_RCC_GPIOB_CLK_ENABLE();

  __HAL_RCC_AFIO_CLK_ENABLE();
  __HAL_AFIO_REMAP_SWJ_DISABLE();

  /*Configure GPIO pin Output Level */
  HAL_GPIO_WritePin(scl_GPIO_Port, scl_Pin, GPIO_PIN_SET);

  /*Configure GPIO pin Output Level */
  HAL_GPIO_WritePin(sda_GPIO_Port, sda_Pin, GPIO_PIN_RESET);

  /*Configure GPIO pin : button_Pin */
  GPIO_InitStruct.Pin = button_Pin;
  GPIO_InitStruct.Mode = GPIO_MODE_INPUT;
  GPIO_InitStruct.Pull = GPIO_PULLUP;
  HAL_GPIO_Init(button_GPIO_Port, &GPIO_InitStruct);

  /*Configure GPIO pins : scl_Pin sda_Pin */
  GPIO_InitStruct.Pin = scl_Pin|sda_Pin;
  GPIO_InitStruct.Mode = GPIO_MODE_OUTPUT_PP;
  GPIO_InitStruct.Pull = GPIO_PULLUP;
  GPIO_InitStruct.Speed = GPIO_SPEED_FREQ_HIGH;
  HAL_GPIO_Init(GPIOB, &GPIO_InitStruct);

/* USER CODE BEGIN MX_GPIO_Init_2 */
/* USER CODE END MX_GPIO_Init_2 */
}
三、实验现象
B站演示视频:https://space.bilibili.com/444388619
联系作者
视频地址:https://space.bilibili.com/444388619/video
专注于51单片机、STM32、国产32、DSP、Proteus、arduino、ESP32、物联网软件开发,PCB设计,视频分享,技术交流。

智能硬件社区聚焦AI智能硬件技术生态,汇聚嵌入式AI、物联网硬件开发者,打造交流分享平台,同步全国赛事资讯、开展 OPC 核心人才招募,助力技术落地与开发者成长。
更多推荐


 1
1 0
0- 0


 已为社区贡献7条内容

所有评论(0)