使用 VBA 宏创建一个选择全部word图片快捷指令,进行图片格式编辑
代码只选择“嵌入式图片”(InlineShape),“浮动图片”(Shape)2、在 Word 中按下 Alt + F11 打开 VBA 编辑器。office word 365,文件格式为.docx。运行后选中所有图片按照单个图片修改格式即可。插入一个模块(“插入” → “模块”)。使用 VBA 宏批量选择图片。
使用 VBA 宏批量选择图片
✅ 第一步:创建 .dotm 加载项文件
1、使用环境
office word 365,文件格式为.docx
图片格式为.PNG
2、创建 .dotm 加载项文件
打开 Word,新建一个空白文档。
按下 Alt + F11 打开 VBA 编辑器。
点击菜单栏:插入一个模块(“插入” → “模块”)。
输入以下代码(代码只选择“嵌入式图片”(InlineShape),“浮动图片”(Shape))
Sub 全选图片()
    Dim s As Shape
    Dim ils As InlineShape
    ' 选择所有嵌入式图片(InlineShape)
    For Each ils In ActiveDocument.InlineShapes
        ils.Select
    Next ils
    ' 选择所有浮动图片(Shape)
    For Each s In ActiveDocument.Shapes
        s.Select Replace:=False
    Next s
End Sub
3、测试运行效果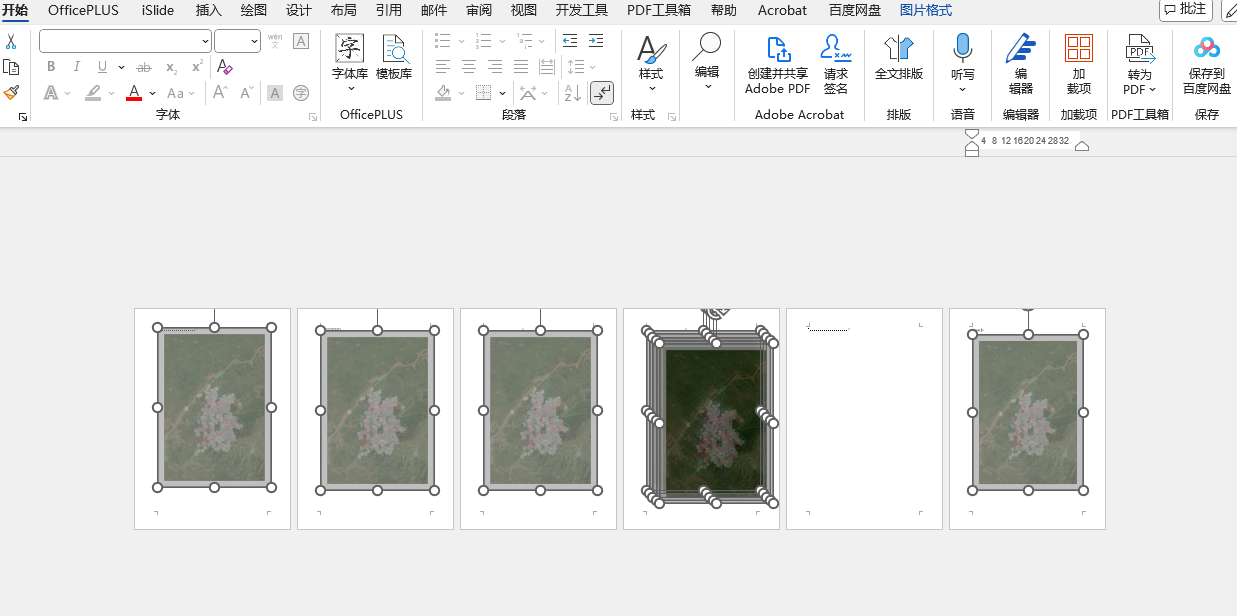
运行后选中所有图片按照单个图片修改格式即可
4、保存文件
点击 文件 → 另存为,选择类型为:
📁 Word 启动宏模板(*.dotm)
命名为:全选图片.dotm
✅ 第二步:将 .dotm 添加为 Word 加载项
在 Word 主界面点击菜单:
文件 → 选项 → 加载项。
在底部选择“管理:Word 加载项”,点击右侧【转到】。
在弹出的对话框中点击【添加】。
找到你刚刚保存的 .dotm 文件 → 打开。
勾选这个加载项 → 点击【确定】。
第三步(可选):将宏添加到工具栏/自定义选项卡
在 Word 顶部点击右上角的下拉箭头 → 选择【更多命令】。
从左侧的“选择命令”下拉中选择【宏】。
找到你的 SelectAllPictures 宏,添加到右侧“快速访问工具栏”或自定义选项卡中。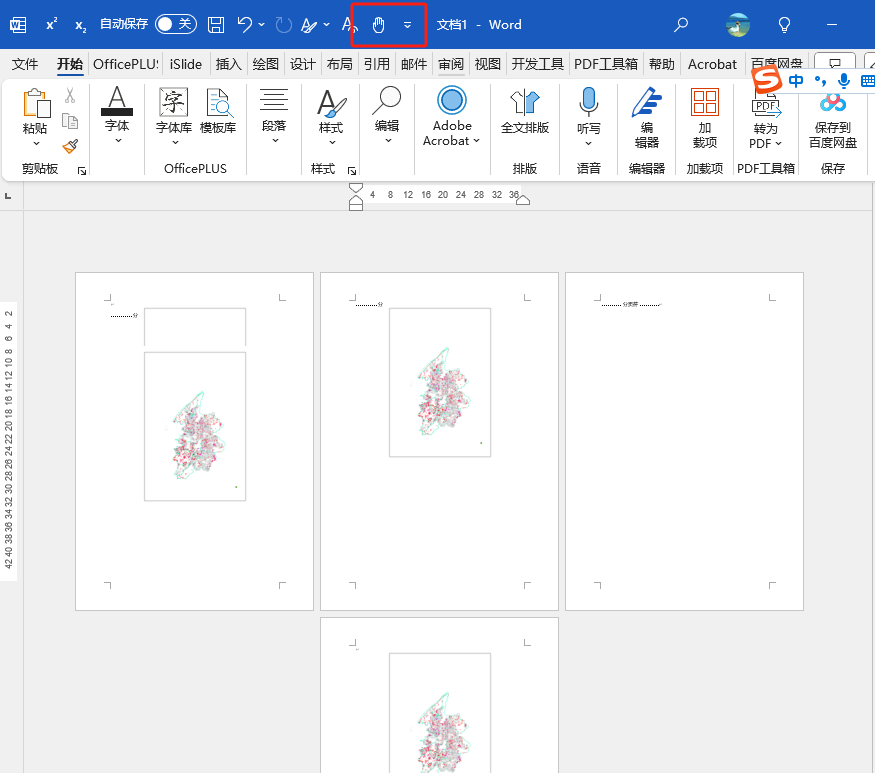
补充代码
1、 图片居中
Sub 图片居中对齐()
    Dim ils As InlineShape
    Dim s As Shape

    ' 处理所有嵌入式图片
    For Each ils In ActiveDocument.InlineShapes
        ' 将图片所在段落居中
        ils.Range.ParagraphFormat.Alignment = wdAlignParagraphCenter
    Next ils

    ' 处理所有浮动图片
    For Each s In ActiveDocument.Shapes
        With s
            ' 设置水平居中(相对于页面)
            .RelativeHorizontalPosition = wdRelativeHorizontalPositionPage
            .Left = wdShapeCenter
        End With
    Next s
End Sub
2、图片居左
Sub 图片居左对齐()
    Dim ils As InlineShape
    Dim s As Shape

    ' 处理所有嵌入式图片
    For Each ils In ActiveDocument.InlineShapes
        ' 将图片所在段落左对齐
        ils.Range.ParagraphFormat.Alignment = wdAlignParagraphLeft
    Next ils

    ' 处理所有浮动图片
    For Each s In ActiveDocument.Shapes
        With s
            ' 设置水平位置为页面相对
            .RelativeHorizontalPosition = wdRelativeHorizontalPositionPage
            ' 设置左对齐
            .Left = 0
        End With
    Next s
End Sub
3、图片居右
Sub 图片居右对齐()
    Dim ils As InlineShape
    Dim s As Shape

    ' 处理所有嵌入式图片
    For Each ils In ActiveDocument.InlineShapes
        ' 设置其所在段落右对齐
        ils.Range.ParagraphFormat.Alignment = wdAlignParagraphRight
    Next ils

    ' 处理所有浮动图片
    For Each s In ActiveDocument.Shapes
        With s
            ' 设置相对于页面的水平位置
            .RelativeHorizontalPosition = wdRelativeHorizontalPositionPage
            ' 设置浮动图像右对齐
            .Left = ActiveDocument.PageSetup.PageWidth - ActiveDocument.PageSetup.RightMargin - .Width
        End With
    Next s
End Sub
调整所有图片的大小
Sub BatchResizePictures()

    ' --- 【必填】在此处设置你需要的尺寸 (单位:磅/Points) ---
    ' 1 厘米 ≈ 28.35 磅; 1 英寸 = 72 磅

    Const NEW_WIDTH_CM As Single = 14.65    ' 设置目标宽度 (单位: 厘米)
    Const NEW_HEIGHT_CM As Single = 10.98    ' 设置目标高度 (单位: 厘米)

    ' --- 换算成磅 (Word的默认单位) ---
    Const CM_PER_POINT As Single = 28.35 ' 1 厘米 ≈ 28.35 磅
    Dim targetWidth As Single
    Dim targetHeight As Single

    targetWidth = NEW_WIDTH_CM * CM_PER_POINT
    targetHeight = NEW_HEIGHT_CM * CM_PER_POINT

    ' -------------------------------------------------------------

    Dim shp As Shape
    Dim iShp As InlineShape
    Dim pictureCount As Long
    pictureCount = 0

    ' 1. 处理所有浮动图片 (Shapes)
    For Each shp In ActiveDocument.Shapes
        ' 检查对象是否为图片类型 (msoPicture, msoLinkedPicture)
        If shp.Type = msoPicture Or shp.Type = msoLinkedPicture Then
            ' 强制设置新的尺寸
            shp.LockAspectRatio = msoFalse ' 取消锁定纵横比
            shp.Width = targetWidth
            shp.Height = targetHeight
            pictureCount = pictureCount + 1
        End If
    Next shp

    ' 2. 处理所有内嵌图片 (InlineShapes)
    For Each iShp In ActiveDocument.InlineShapes
        ' 检查对象是否为图片类型 (wdInlineShapePicture)
        If iShp.Type = wdInlineShapePicture Then
            ' 强制设置新的尺寸
            iShp.LockAspectRatio = msoFalse ' 取消锁定纵横比
            iShp.Width = targetWidth
            iShp.Height = targetHeight
            pictureCount = pictureCount + 1
        End If
    Next iShp

    ' 提示用户操作结果
    MsgBox "批量设置图片尺寸操作完成!共处理了 " & pictureCount & " 张图片。", vbInformation

End Sub

智能硬件社区聚焦AI智能硬件技术生态,汇聚嵌入式AI、物联网硬件开发者,打造交流分享平台,同步全国赛事资讯、开展 OPC 核心人才招募,助力技术落地与开发者成长。
更多推荐


 1
1 0
0- 0


 已为社区贡献2条内容

所有评论(0)