MaixCAM教程4:MaixCAM实现YOLO识别+串口收发功能
本文介绍使用MaixCAM开发板实现基于YOLOv5的目标检测与串口通信功能。通过加载预训练模型检测数字"5",当检测到该目标时自动通过UART1串口发送"hello world"信息。硬件连接采用USB转TTL模块,配置A18/A19引脚为串口功能。软件实现包括:初始化YOLOv5模型、配置串口参数、读取摄像头画面、实时目标检测与标注显示等功能。代码提供了
·
使用的套件是MaixCAM,带屏幕版
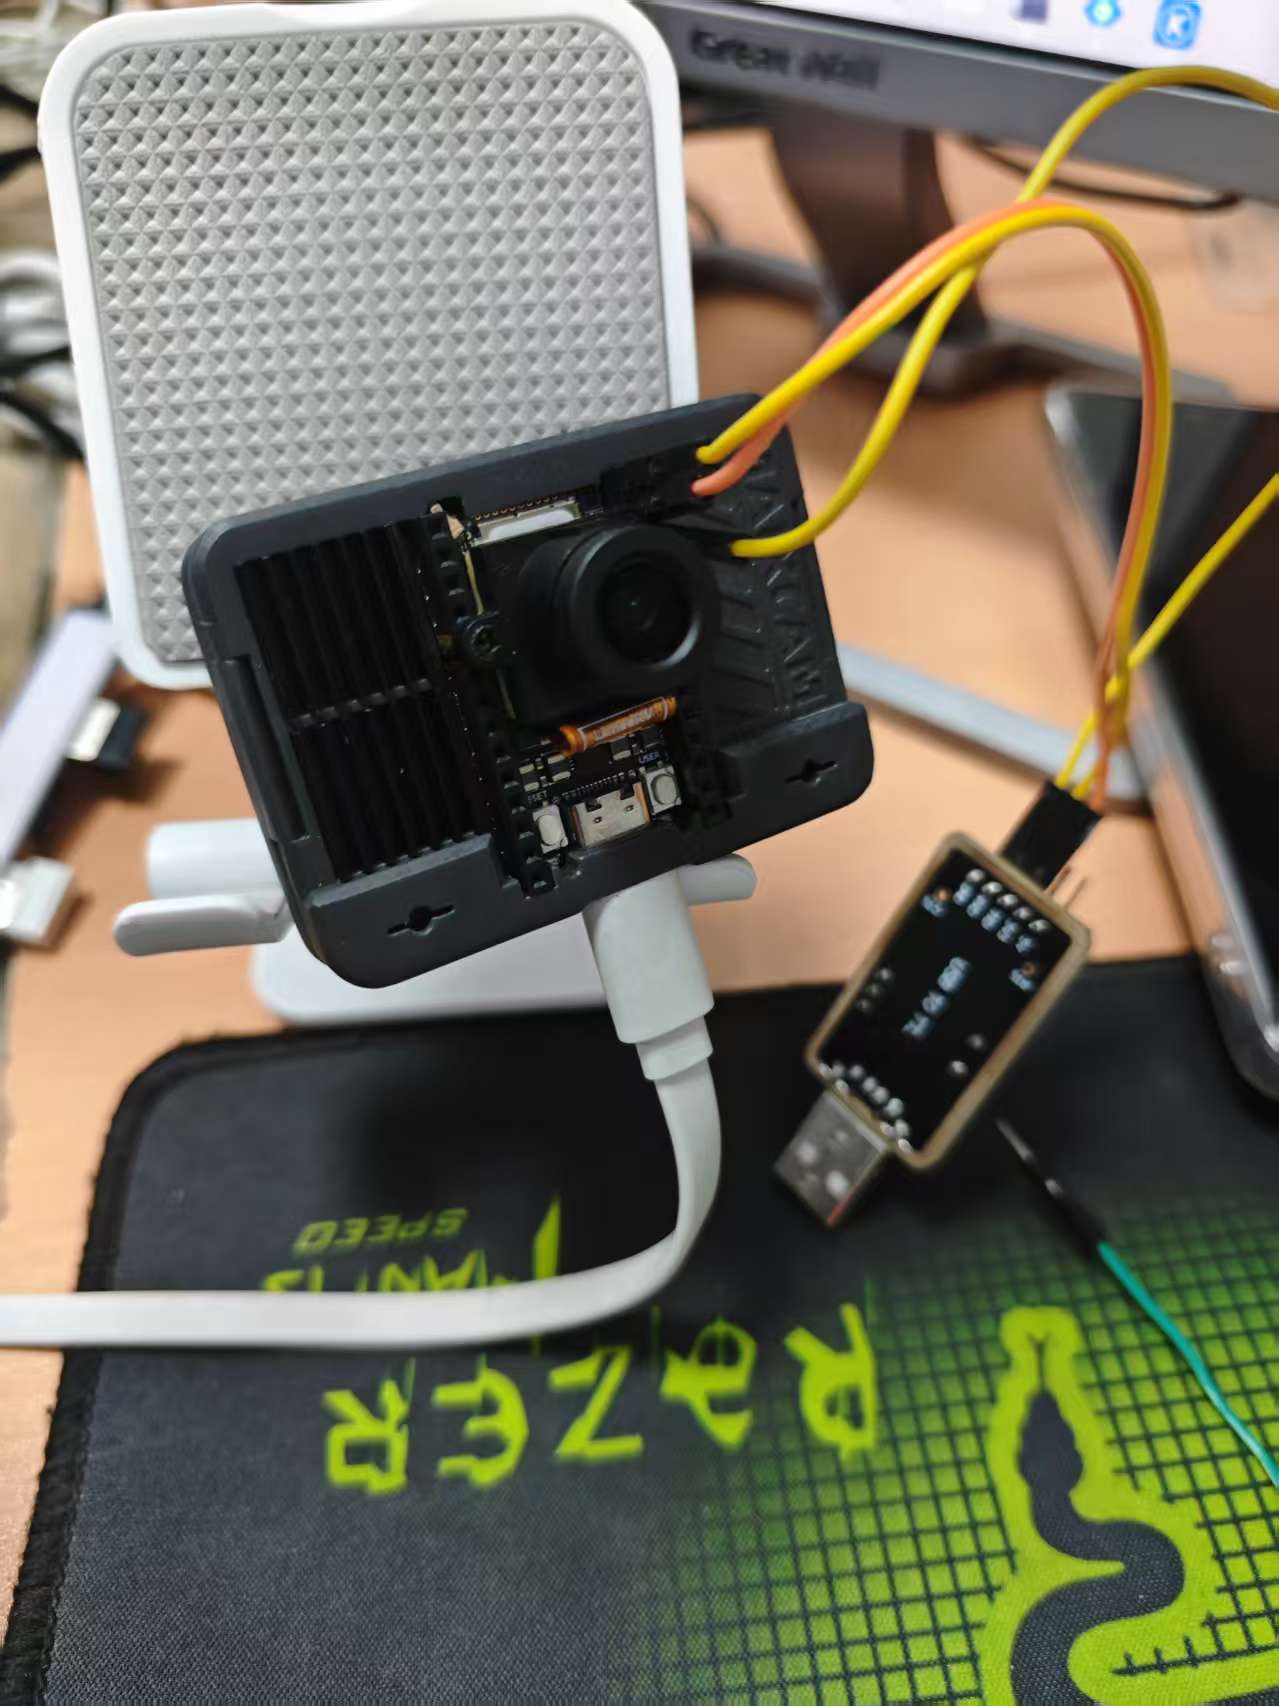
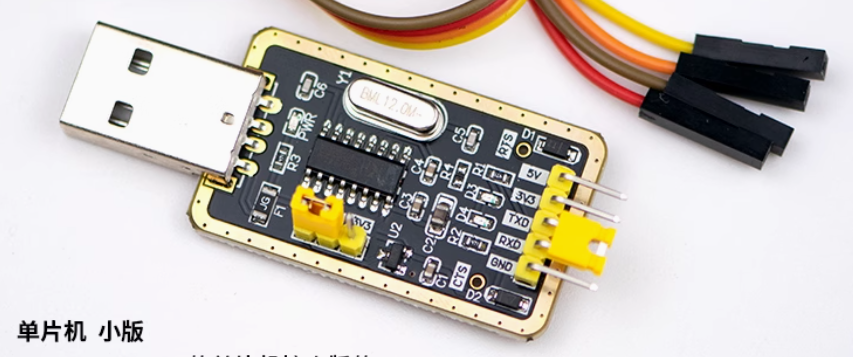
使用的USB转TTL是
首先完成接线,转接线接MaixCAM接线方式如下:
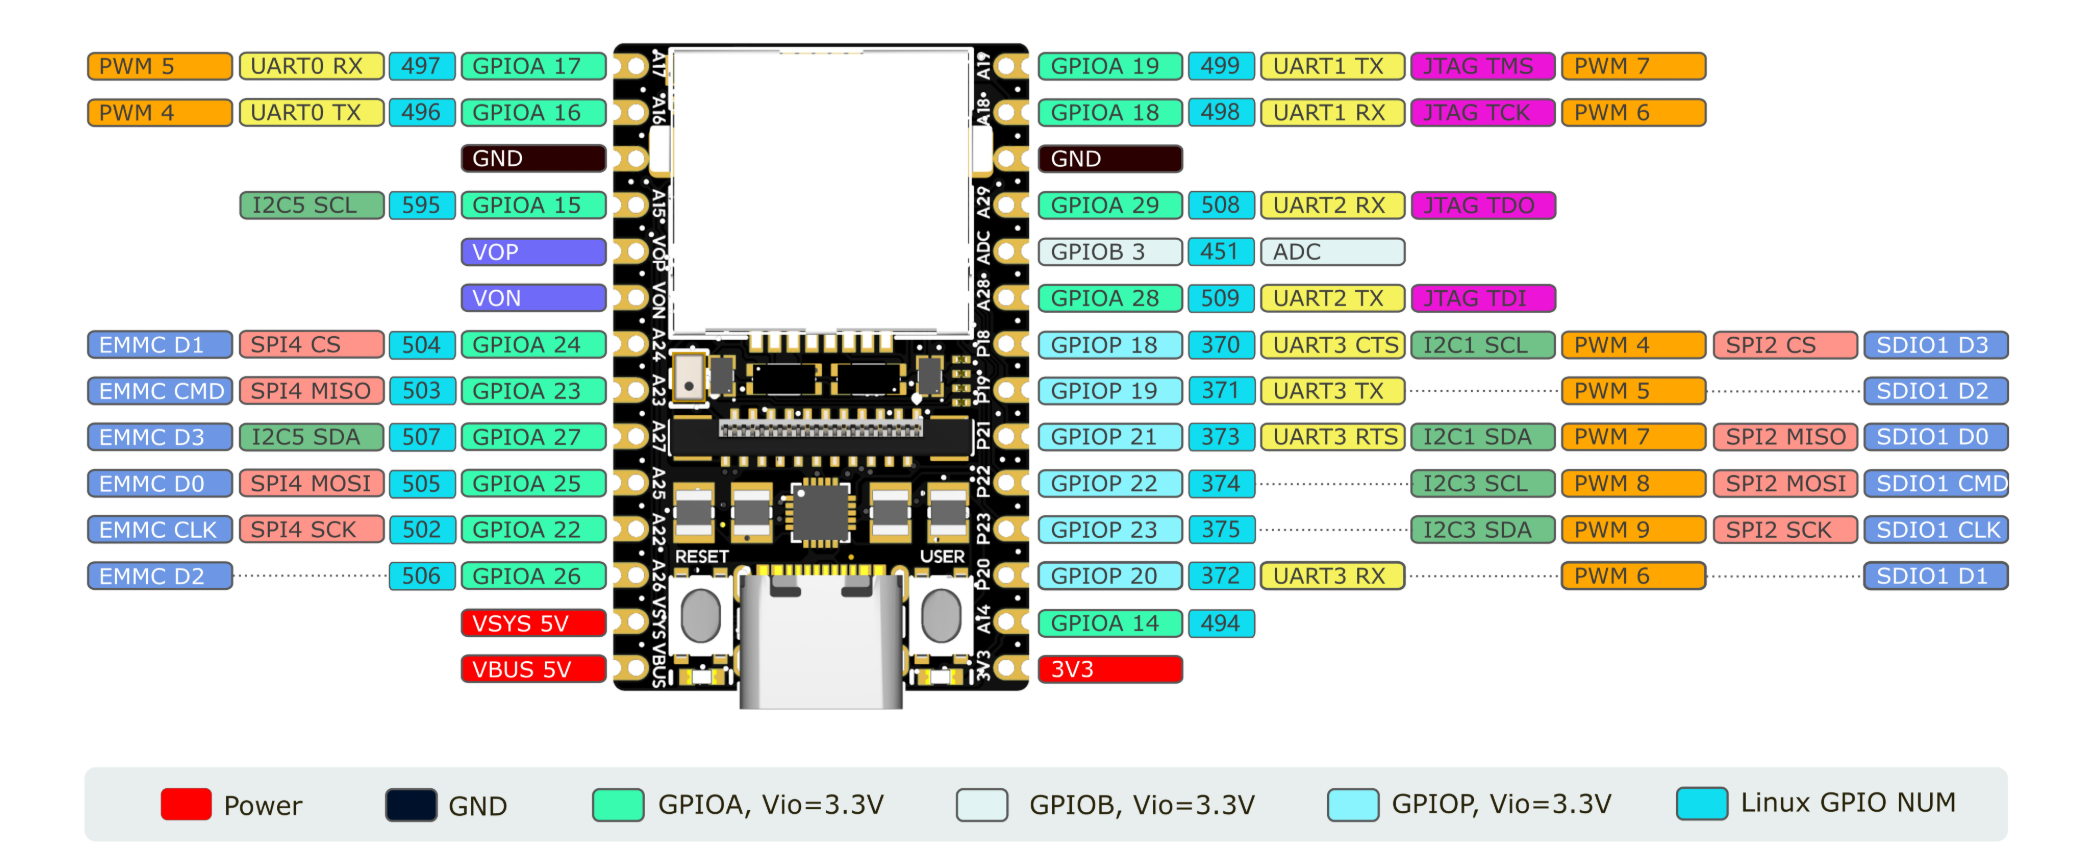
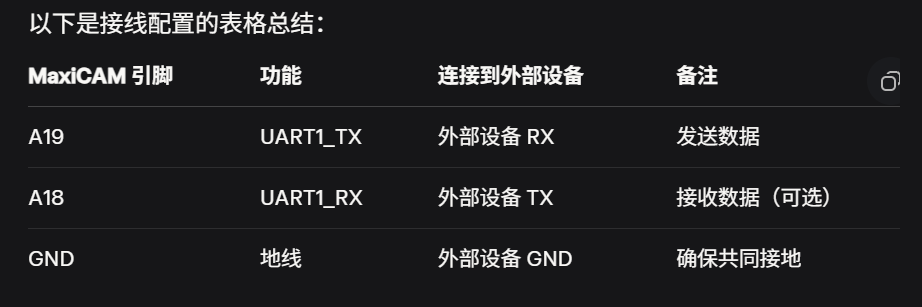 MaixCAM引脚如图:
下面是代码部分
本代码部分以yolo5检测相关的数字”5“为标志来触发是否发送数据
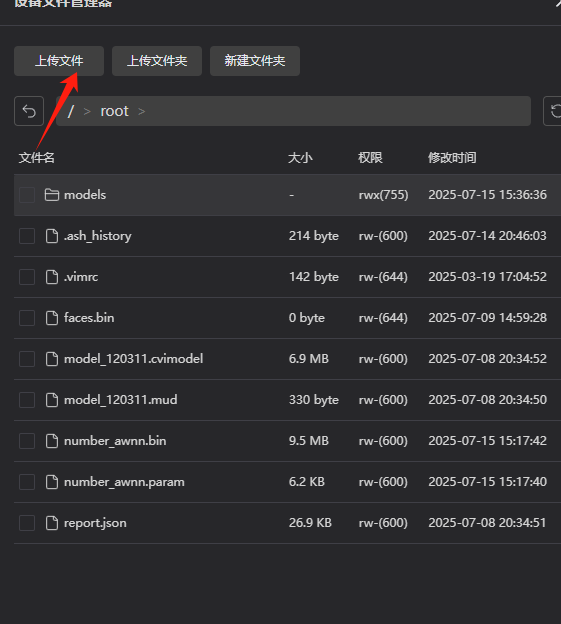
UP用的模型是:MaixHub
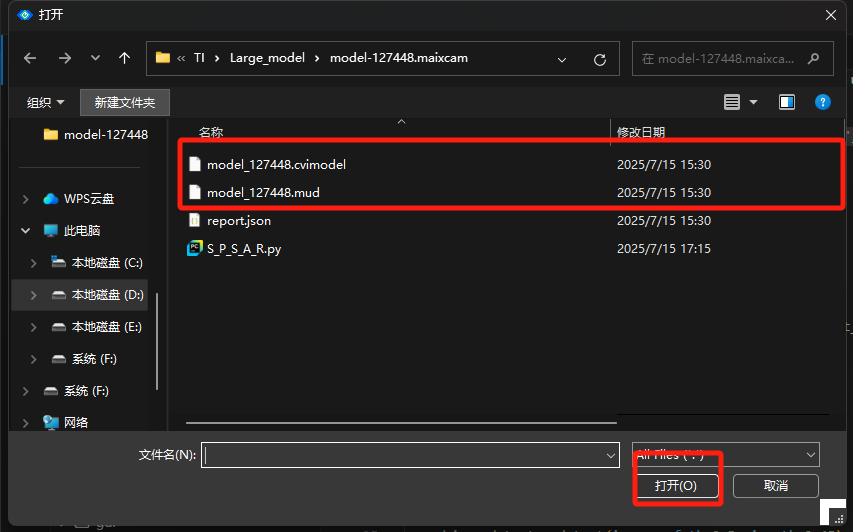
当你打开模型会发现如图三个模型:

其中MUD文件为模型文件,CV文件为代码运行时的识别文件(一定要加,否则代码识别不到相关的mud文件)
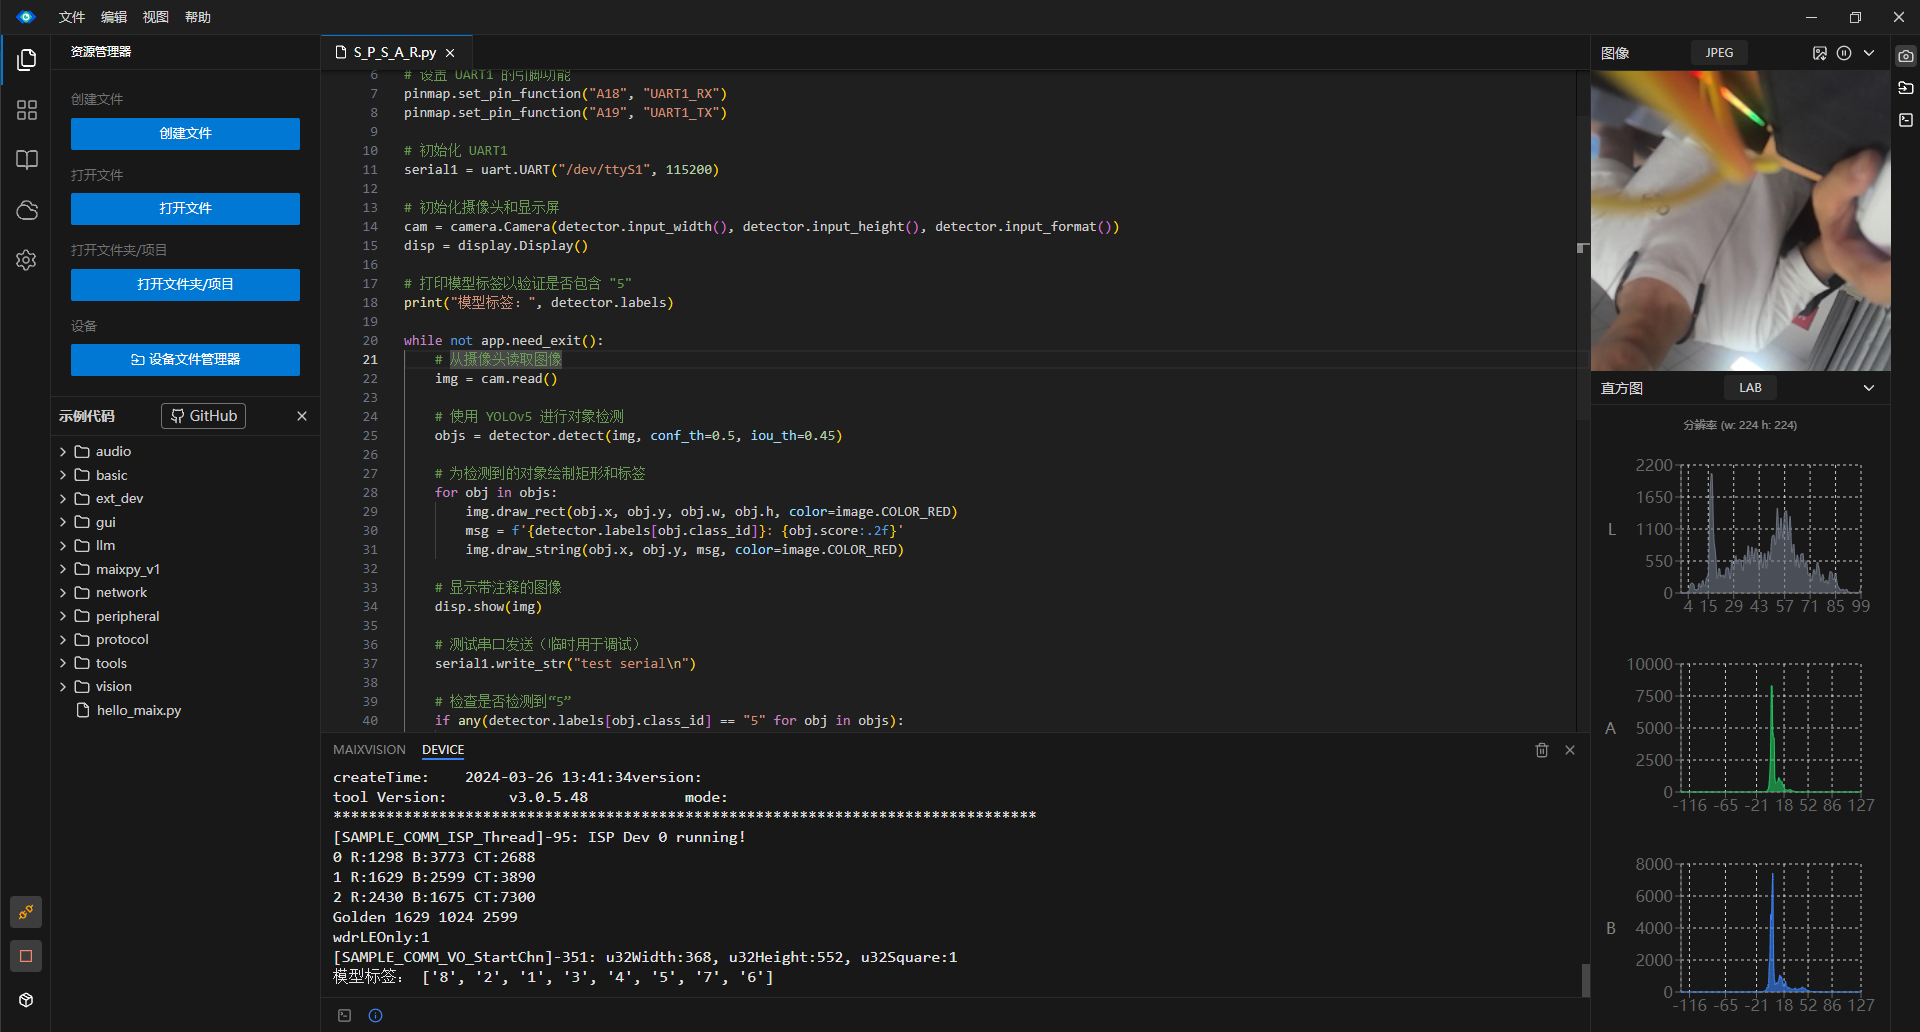
接下来上电,敲代码:
#需要导入的包
from maix import camera, display, image, nn, app, pinmap, uart
1.导入模型:

2.加载相关的视觉模型
# 加载 YOLOv5 模型,你自己要知道路径
detector = nn.YOLOv5(model="/root/models/model_127448.mud", dual_buff=True)
3.配置相关的引脚功能:
# 设置 UART1 的引脚功能
pinmap.set_pin_function("A18", "UART1_RX")
pinmap.set_pin_function("A19", "UART1_TX")

# 初始化 UART1
serial1 = uart.UART("/dev/ttyS1", 115200)
4.初始化摄像头和显示屏使得画面能够显示在屏幕上和MaixVision上面
# 初始化摄像头和显示屏
cam = camera.Camera(detector.input_width(), detector.input_height(), detector.input_format())
disp = display.Display()
5.从摄像头读取图像并检测,并且进行相应的图像绘制
 # 从摄像头读取图像
    img = cam.read()

    # 使用 YOLOv5 进行对象检测
    objs = detector.detect(img, conf_th=0.5, iou_th=0.45)

    # 为检测到的对象绘制矩形和标签
    for obj in objs:
        img.draw_rect(obj.x, obj.y, obj.w, obj.h, color=image.COLOR_RED)
        msg = f'{detector.labels[obj.class_id]}: {obj.score:.2f}'
        img.draw_string(obj.x, obj.y, msg, color=image.COLOR_RED)

    # 显示带注释的图像
    disp.show(img)
6.测试相关的串口,检验其功能
# 测试串口发送(临时用于调试)
    serial1.write_str("test serial\n")

    # 检查是否检测到“5”
    if any(detector.labels[obj.class_id] == "5" for obj in objs):
        # 通过串口发送“hello world”
        serial1.write_str("hello world\n")
7.完整代码如下
from maix import camera, display, image, nn, app, pinmap, uart
# 加载 YOLOv5 模型
detector = nn.YOLOv5(model="/root/models/model_127448.mud", dual_buff=True)
# 设置 UART1 的引脚功能
pinmap.set_pin_function("A18", "UART1_RX")
pinmap.set_pin_function("A19", "UART1_TX")
# 初始化 UART1
serial1 = uart.UART("/dev/ttyS1", 115200)
# 初始化摄像头和显示屏
cam = camera.Camera(detector.input_width(), detector.input_height(), detector.input_format())
disp = display.Display()
# 打印模型标签以验证是否包含 "5"
print("模型标签:", detector.labels)
while not app.need_exit():
# 从摄像头读取图像
img = cam.read()
# 使用 YOLOv5 进行对象检测
objs = detector.detect(img, conf_th=0.5, iou_th=0.45)
# 为检测到的对象绘制矩形和标签
for obj in objs:
img.draw_rect(obj.x, obj.y, obj.w, obj.h, color=image.COLOR_RED)
msg = f'{detector.labels[obj.class_id]}: {obj.score:.2f}'
img.draw_string(obj.x, obj.y, msg, color=image.COLOR_RED)
# 显示带注释的图像
disp.show(img)
# 测试串口发送(临时用于调试)
serial1.write_str("test serial\n")
# 检查是否检测到“5”
if any(detector.labels[obj.class_id] == "5" for obj in objs):
# 通过串口发送“hello world”
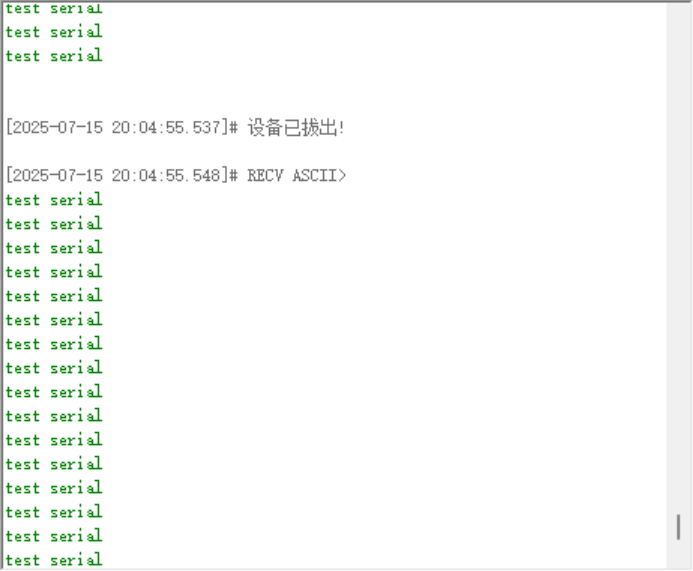
serial1.write_str("hello world\n")8.效果展示:

智能硬件社区聚焦AI智能硬件技术生态,汇聚嵌入式AI、物联网硬件开发者,打造交流分享平台,同步全国赛事资讯、开展 OPC 核心人才招募,助力技术落地与开发者成长。
更多推荐


 16
16 0
0- 0


 已为社区贡献3条内容

所有评论(0)