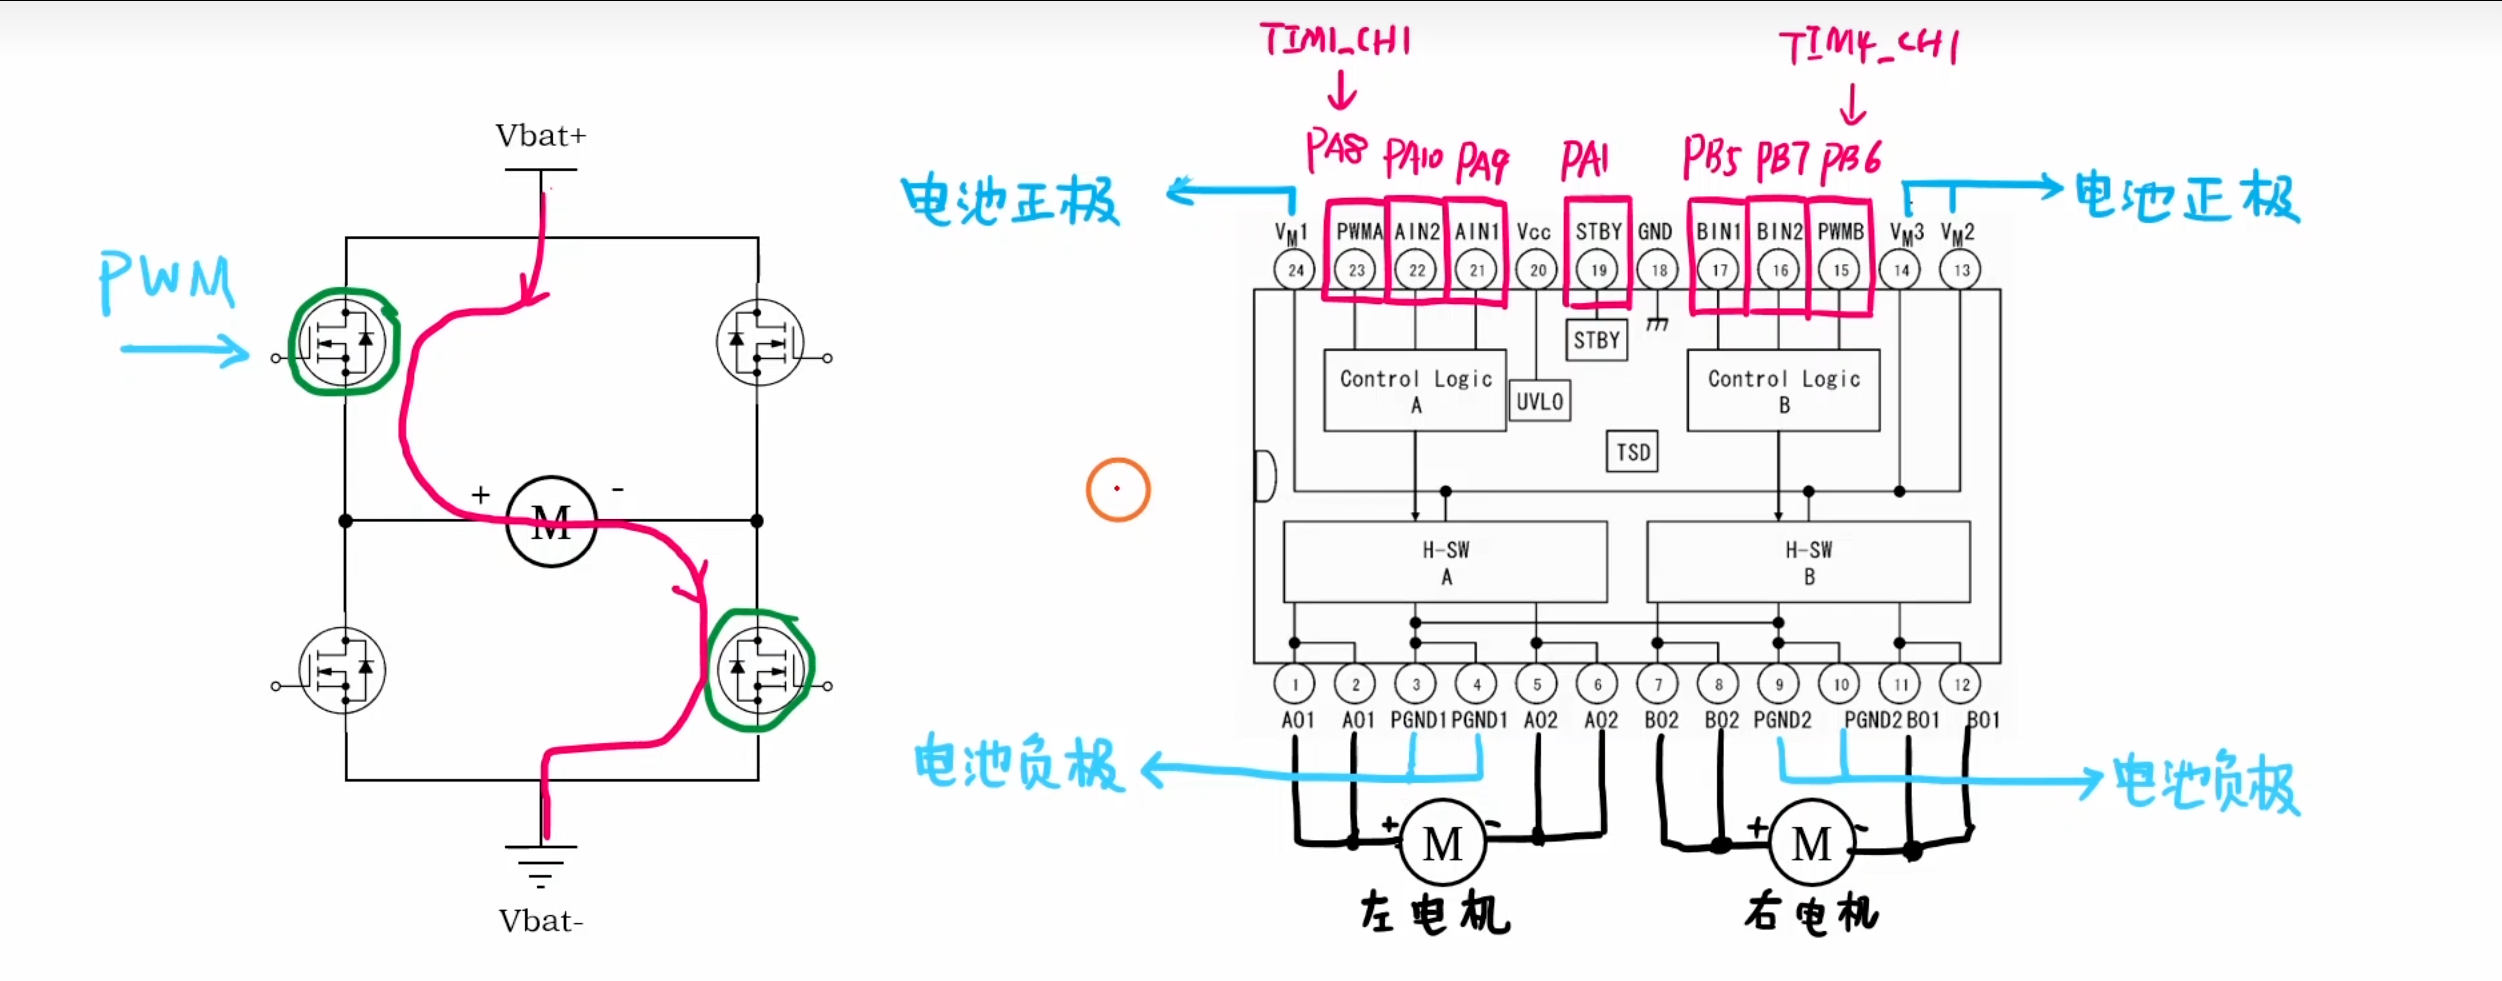
铁头山羊平衡车---电机调速(1)
void STBY_Pin_Init(void)是一个简单的GPIO初始化,对应的口也都在电路图里可以看到,这里的代码写在App_PWM.c里,是对电机的代码。这个STBY用的是按钮,涉及到按钮需要用到button.c和button.h,同时用到裸机多任务模型。电路图在上面,在这个代码里需要实现的是电机的休眠/工作,同时LED的亮灭。两颗LED可以看电路图,给STBY写1的时候,它是会自己亮的。首
·
首先进行STBY的代码编写,需要实现的功能:待机/休眠。
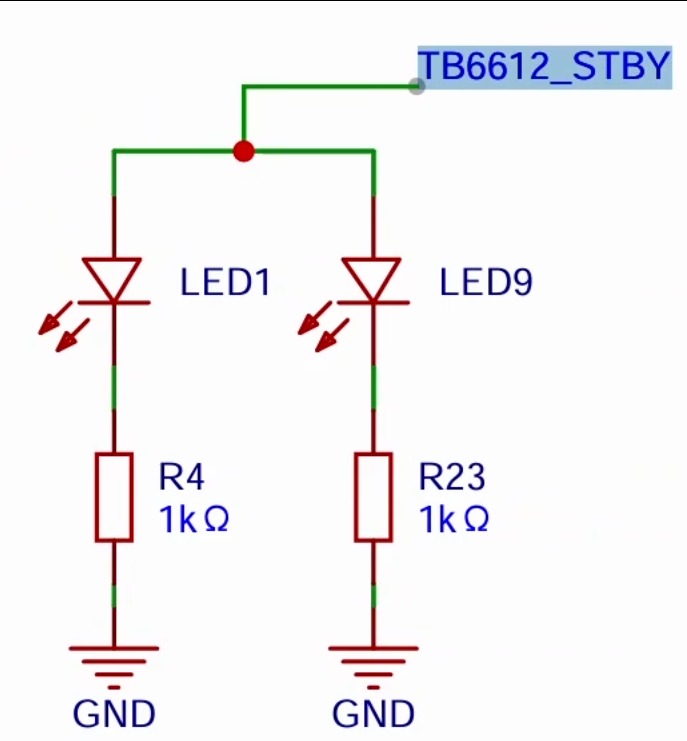
同时,这个STBY还控制两颗LED。这个STBY用的是按钮,涉及到按钮需要用到button.c和button.h,同时用到裸机多任务模型。
逻辑多任务模型: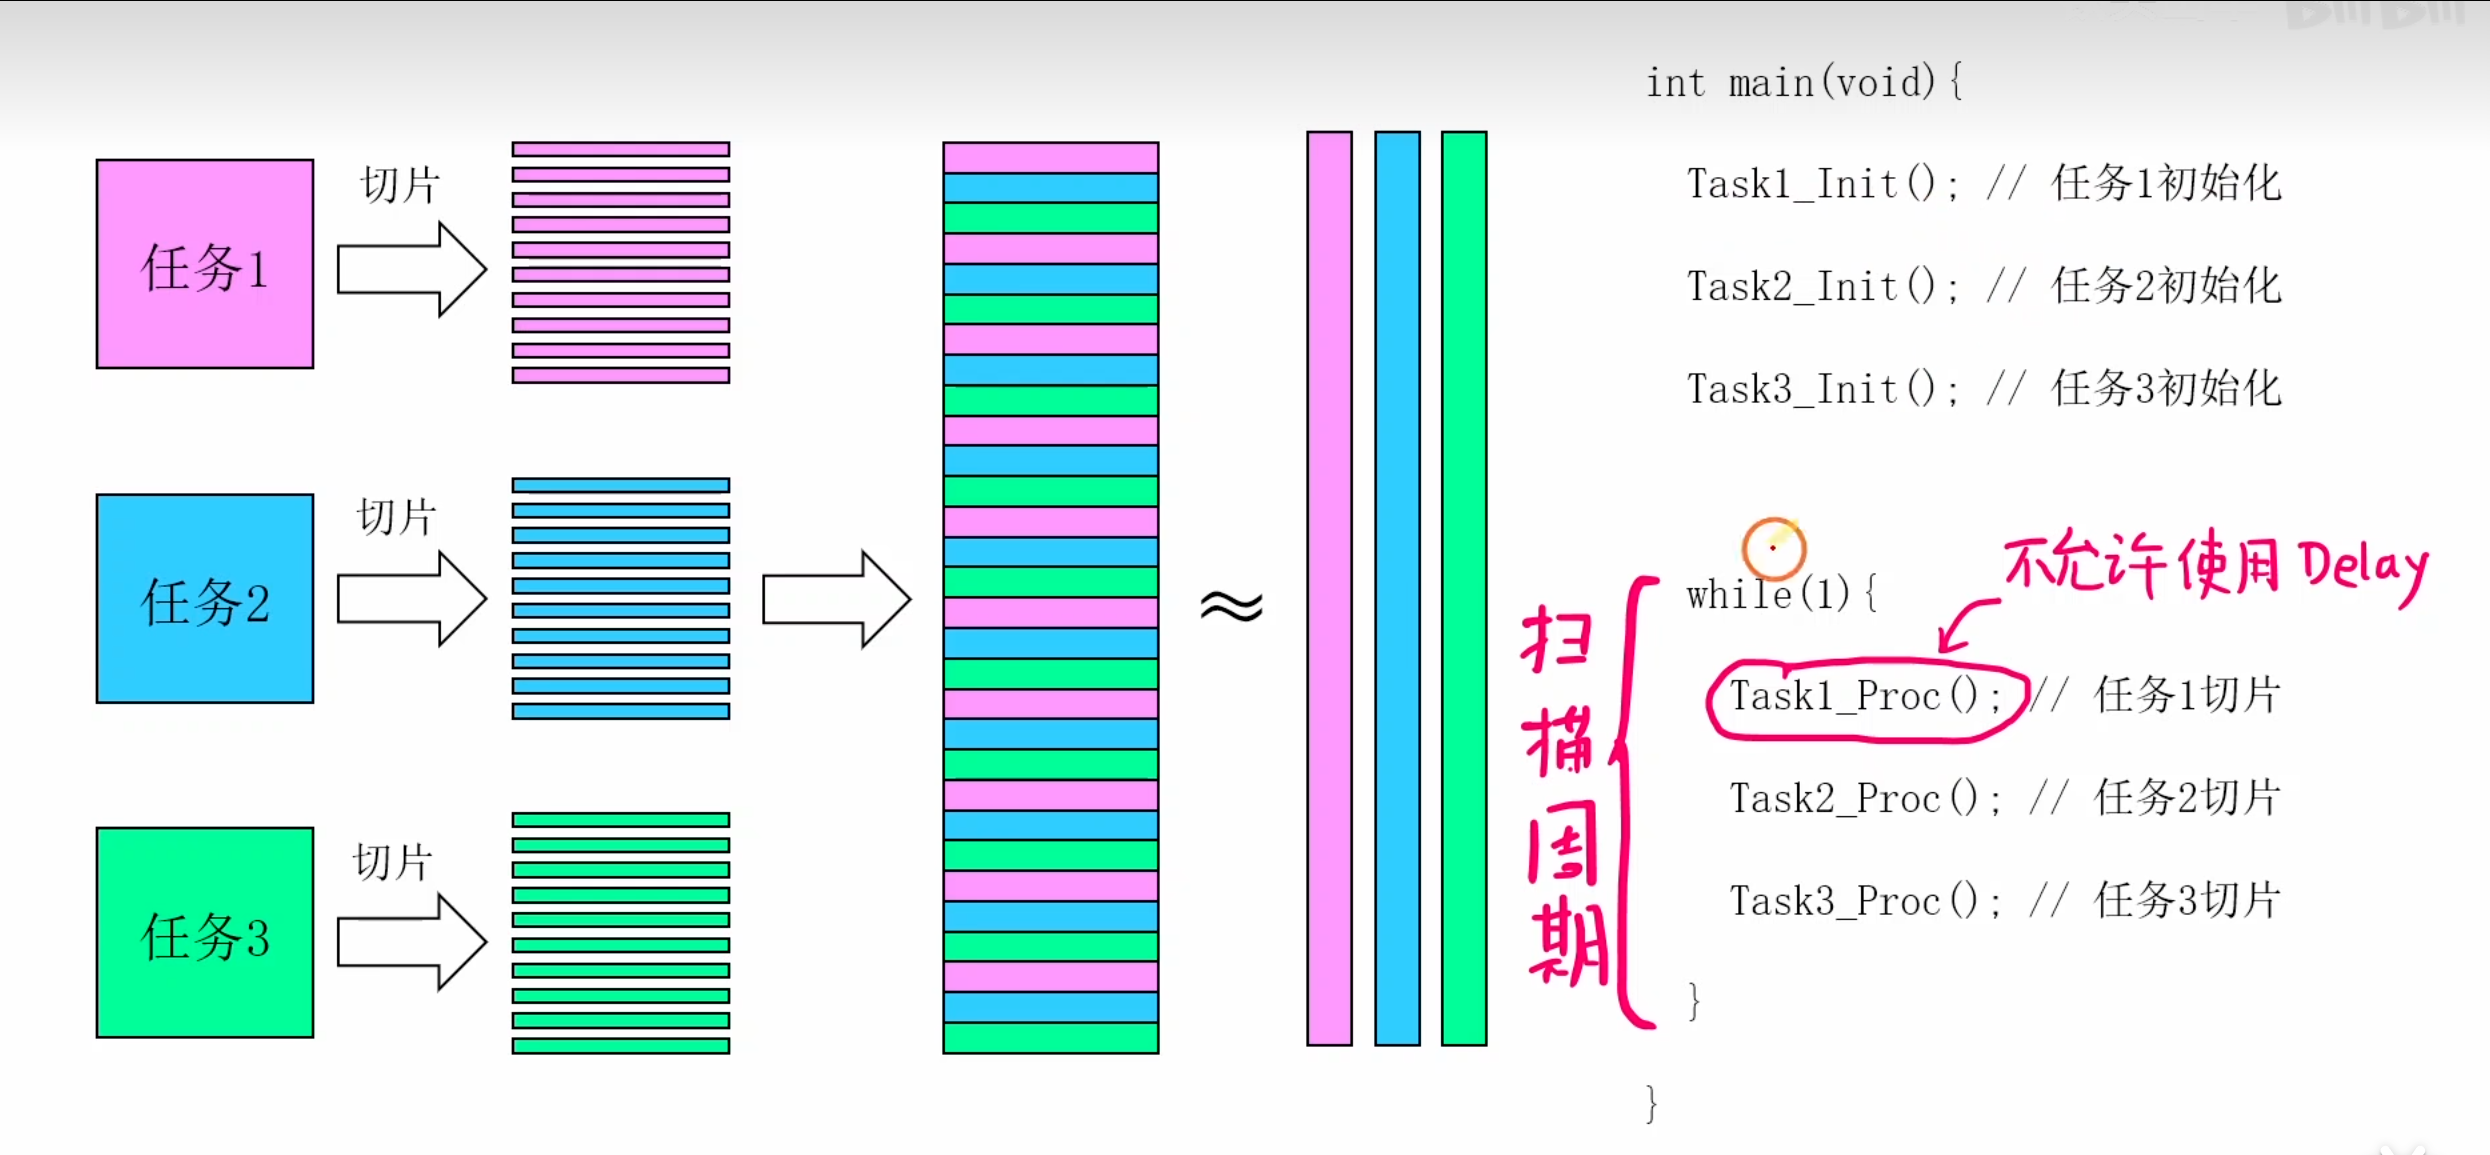
按钮代码和连线位置如下:

#include "app_button.h"
#include "button.h"
#include "app_pwm.h"

static Button_TypeDef userKey;  //用户按钮

static void OnUserKey_Clicked(uint8_t clicks);

//
//简介:按钮初始化
//
void App_Button_Init(void)
{
    Button_InitTypeDef Button_InitStructure = {0};

    Button_InitStructure.GPIOx = GPIOA;
    Button_InitStructure.GPIO_Pin = GPIO_Pin_11;

    My_Button_Init(&userKey,&Button_InitStructure);

    My_Button_SetClickCb(&userKey,OnUserKey_Clicked);
}

void App_Button_Proc(void)
{
    My_Button_Proc(&userKey);
}

//
//简介:0-电机休眠 1-电机工作
//
static uint8_t pwm_on = 0;

//
//简介:按钮点击的回调函数
//
static void OnUserKey_Clicked(uint8_t clicks)
{
   if(clicks == 1)
   {
      //翻转状态
       if(pwm_on == 0)
       {
           pwm_on = 1;
       }
       else
       {
           pwm_on = 0;
       }

       App_PWM_Cmd(pwm_on);
   }
}
按钮写完之后是写STBY的控制函数
电路图在上面,在这个代码里需要实现的是电机的休眠/工作,同时LED的亮灭。
void STBY_Pin_Init(void)是一个简单的GPIO初始化,对应的口也都在电路图里可以看到,这里的代码写在App_PWM.c里,是对电机的代码。
//
//简介:控制TB6612的状态,会在外部App_Button.c被调用
//
void App_PWM_Cmd(uint8_t on)
{
   if(on == 0)
   {
        GPIO_Wrtite(GPIOA,GPIO_Pin_1,Bit_RESET);
   }
   else
   {
        GPIO_Wrtite(GPIOA,GPIO_Pin_1,Bit_SET);
   }
}
两颗LED可以看电路图,给STBY写1的时候,它是会自己亮的。

智能硬件社区聚焦AI智能硬件技术生态,汇聚嵌入式AI、物联网硬件开发者,打造交流分享平台,同步全国赛事资讯、开展 OPC 核心人才招募,助力技术落地与开发者成长。
更多推荐


 8
8 0
0- 0


 已为社区贡献2条内容

所有评论(0)