esp32开发与应用(http服务器)
【 声明:版权所有,欢迎转载,请勿用于商业用途。 联系信箱:feixiaoxing @163.com】
大家都知道,esp32本身是以wifi和bt见长。既然说到了wifi,那么就有两种模式,一种是ap,一种是station。在实际开发中,很多时候都是先用ap配置wifi和密码,然后转到station模式,这是比较常见的做法。那么另外一个大家可能不太熟悉的地方,就是esp32还自带了http服务器,写起来也不复杂。
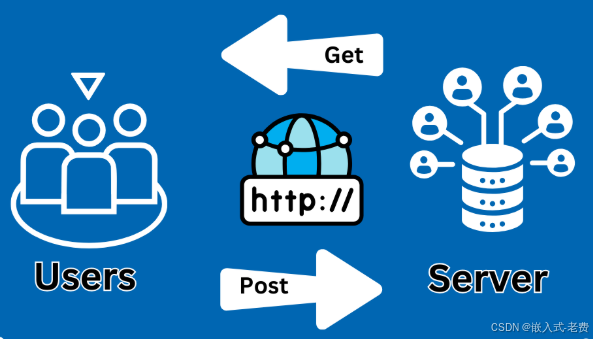
1、http服务器
所谓http服务器,就是外部使用者可以通过浏览器的方式直接访问设备,或者是模块。对于小的模块来说,这种方式一般是用来配置参数,比如端口号、波特率、pid参数等等,都是可以的,使用起来特别方便,不需要串口,也不需要usb,wifi直连就行。
2、静态网页
既然是http服务器,那么前端这些内容做到哪里呢?很多时候,嵌入式设备当中,静态网页、css、js这些内容,都是固化成一个字符串保存的,甚至可能是一个只读字符数组。
3、回调机制
大部分http server的开发,都是通过回调机制来完成的。这种回调,就是对方发一个什么url的时候,那么这边就会触发一次回调函数。至于你想回什么内容,就看双方的约定了。
4、向ai学demo
如果对esp32编写web server还是没有什么印象,可以让ai写一个esp32的http服务器。这样,不出意外,很快ai就可以写出来一个web server,
#include <stdio.h>
#include <string.h>
#include "freertos/FreeRTOS.h"
#include "freertos/task.h"
#include "esp_system.h"
#include "esp_wifi.h"
#include "esp_event.h"
#include "esp_log.h"
#include "nvs_flash.h"
#include "esp_http_server.h"

// Please modify these to match your WiFi credentials
#define WIFI_SSID      "NETGEAR"
#define WIFI_PASS      "12345678"

static const char *TAG = "HTTP_SERVER";

/* Handler for GET / request */
static esp_err_t root_get_handler(httpd_req_t *req)
{
    const char resp[] = "<html><body><h1>Hello, ESP32!</h1></body></html>";
    httpd_resp_set_type(req, "text/html");
    httpd_resp_send(req, resp, strlen(resp));
    return ESP_OK;
}

/* Register URI handler */
static httpd_uri_t uri_root = {
    .uri       = "/",
    .method    = HTTP_GET,
    .handler   = root_get_handler,
    .user_ctx  = NULL
};

/* Start HTTP server */
static httpd_handle_t start_webserver(void)
{
    httpd_handle_t server = NULL;
    httpd_config_t config = HTTPD_DEFAULT_CONFIG();
    config.lru_purge_enable = true;  // Optional: auto-free sessions when memory is low

    if (httpd_start(&server, &config) == ESP_OK) {
        httpd_register_uri_handler(server, &uri_root);
        ESP_LOGI(TAG, "HTTP server started on port: %d", config.server_port);
        return server;
    }
    ESP_LOGE(TAG, "Failed to start HTTP server");
    return NULL;
}

/* WiFi event handler */
static void wifi_event_handler(void* arg, esp_event_base_t event_base,
                                int32_t event_id, void* event_data)
{
    if (event_base == WIFI_EVENT && event_id == WIFI_EVENT_STA_START) {
        esp_wifi_connect();
    } else if (event_base == WIFI_EVENT && event_id == WIFI_EVENT_STA_DISCONNECTED) {
        esp_wifi_connect();
        ESP_LOGI(TAG, "Reconnecting to WiFi...");
    } else if (event_base == IP_EVENT && event_id == IP_EVENT_STA_GOT_IP) {
        ip_event_got_ip_t* event = (ip_event_got_ip_t*) event_data;
        ESP_LOGI(TAG, "Got IP: " IPSTR, IP2STR(&event->ip_info.ip));
    }
}

/* Initialize WiFi in STA (station) mode */
static void wifi_init_sta(void)
{
    esp_netif_init();
    esp_event_loop_create_default();
    esp_netif_create_default_wifi_sta();

    wifi_init_config_t cfg = WIFI_INIT_CONFIG_DEFAULT();
    esp_wifi_init(&cfg);

    esp_event_handler_instance_t instance_any_id;
    esp_event_handler_instance_t instance_got_ip;
    esp_event_handler_instance_register(WIFI_EVENT, ESP_EVENT_ANY_ID,
                                        &wifi_event_handler, NULL, &instance_any_id);
    esp_event_handler_instance_register(IP_EVENT, IP_EVENT_STA_GOT_IP,
                                        &wifi_event_handler, NULL, &instance_got_ip);

    wifi_config_t wifi_config = {
        .sta = {
            .ssid = WIFI_SSID,
            .password = WIFI_PASS,
        },
    };
    ESP_ERROR_CHECK(esp_wifi_set_mode(WIFI_MODE_STA) );
    ESP_ERROR_CHECK(esp_wifi_set_config(WIFI_IF_STA, &wifi_config) );
    ESP_ERROR_CHECK(esp_wifi_start() );
    ESP_LOGI(TAG, "WiFi init finished.");
}

void app_main(void)
{
    // Initialize NVS (Non-Volatile Storage)
    esp_err_t ret = nvs_flash_init();
    if (ret == ESP_ERR_NVS_NO_FREE_PAGES || ret == ESP_ERR_NVS_NEW_VERSION_FOUND) {
        ESP_ERROR_CHECK(nvs_flash_erase());
        ret = nvs_flash_init();
    }
    ESP_ERROR_CHECK(ret);

    // Connect to WiFi
    wifi_init_sta();

    // Start HTTP server
    httpd_handle_t server = start_webserver();
    if (server == NULL) {
        ESP_LOGE(TAG, "Server start failed, restarting...");
        esp_restart();
    }

    // Main loop (can do other work here)
    while (1) {
        vTaskDelay(pdMS_TO_TICKS(1000));
    }
}
5、编译和测试
这种生成的代码不复杂,一般情况下不会出什么问题。直接编译、下载后,通过log看看对应的ip地址是多少,就可以通过pc浏览器访问模块了。当然因为demo比较简单,只是看到一行打印而已,实际功能的多少,完全取决于我们自己开发的内容。
有了wifi/web server,后续就可以用esp32做很多的内容了。

智能硬件社区聚焦AI智能硬件技术生态,汇聚嵌入式AI、物联网硬件开发者,打造交流分享平台,同步全国赛事资讯、开展 OPC 核心人才招募,助力技术落地与开发者成长。
更多推荐
 7
7 0
0- 0


 已为社区贡献41条内容

所有评论(0)