STM32第一节笔记
·
学习了如何烧录第一个程序,创建第一个项目文件,配置各种库文件,点灯程序。
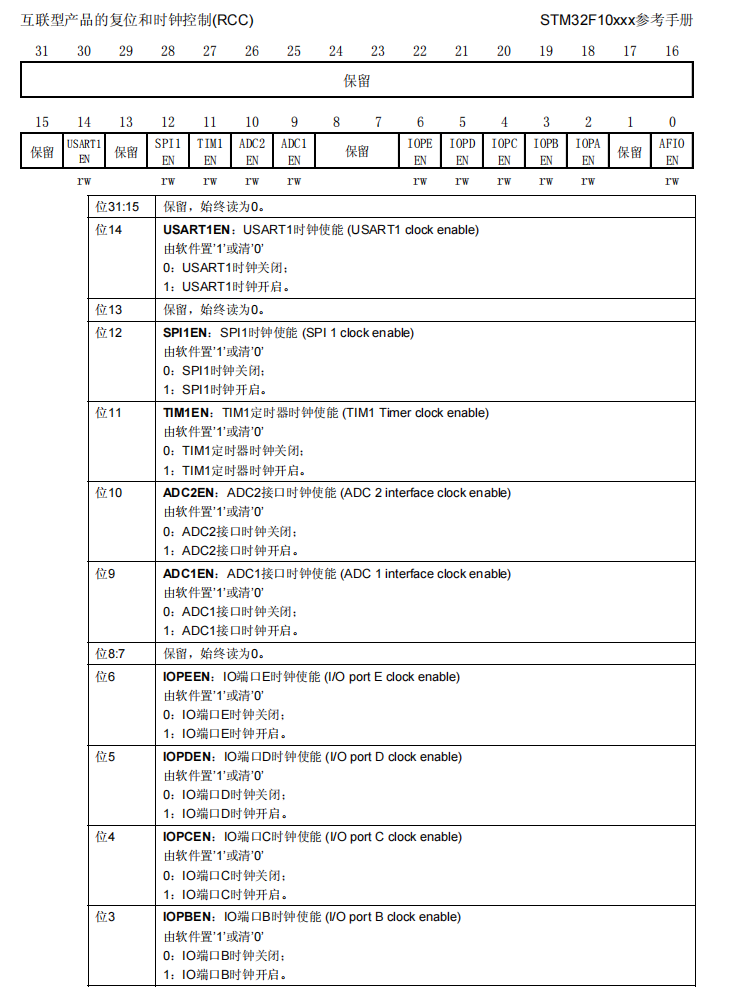 在这里我们控制第四位IO口的C时钟能使STM32的灯亮/灭,然后再控制GPIO13号引脚寄存器的电平设置成低电平来点亮.默认是高电平.
但是我们使用控制寄存器的方式会影响到其他功能所以可以使用STM32封装好的功能来实现。
#include "stm32f10x.h"                  // Device header
int main(){
	//通过RCC_APB2PeriphClockCmd这个方法控制哪个接口,和接口状态
    //查看头文件发现这一行宏定义#define RCC_APB2Periph_GPIOC((uint32_t)0x00000010)
    RCC_APB2PeriphClockCmd(RCC_APB2Periph_GPIOC,ENABLE);
    //然后我们要配置端口状态所以使用GPIO_Init方法去控制,发现函数参数是一个选择哪个GPIO的端口第二个是接口的结构体参数
	GPIO_InitTypeDef GPIO_InitStructure;
	GPIO_InitStructure.GPIO_Mode=GPIO_Mode_Out_PP;
	GPIO_InitStructure.GPIO_Pin=GPIO_Pin_13;
	GPIO_InitStructure.GPIO_Speed=GPIO_Speed_50MHz;
	GPIO_Init(GPIOC,&GPIO_InitStructure);
	GPIO_SetBits(GPIOC,GPIO_Pin_13);
	//GPIO_ResetBits(GPIOC,GPIO_Pin_13);
	while(1){

	}
}
typedef struct
{
uint16_t GPIO_Pin; /*!< Specifies the GPIO pins to be configured.
This parameter can be any value of @ref GPIO_pins_define */
GPIOSpeed_TypeDef GPIO_Speed; /*!< Specifies the speed for the selected pins.
This parameter can be a value of @ref GPIOSpeed_TypeDef */
GPIOMode_TypeDef GPIO_Mode; /*!< Specifies the operating mode for the selected pins.
This parameter can be a value of @ref GPIOMode_TypeDef */
}GPIO_InitTypeDef;
//这是那个结构体的声明 GPIO_InitTypeDef GPIO_InitStructure;
GPIO_InitStructure.GPIO_Mode=GPIO_Mode_Out_PP;
GPIO_InitStructure.GPIO_Pin=GPIO_Pin_13;
GPIO_InitStructure.GPIO_Speed=GPIO_Speed_50MHz;
//通过查看结构体声明可以发现我们需要这三个参数,GPIO默认输出端口,和输出的端口名,输出频率//最后取地址结构体+端口
GPIO_Init(GPIOC,&GPIO_InitStructure);
//使用GPIO_SetBits可以讲选择的端口设置为高电平
//GPIO_SetBits(GPIOC,GPIO_Pin_13);
//反之
GPIO_ResetBits(GPIOC,GPIO_Pin_13);最后完成点灯操作
补充一下
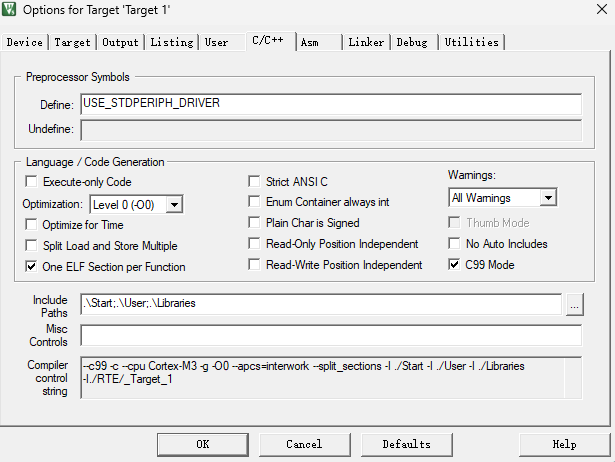
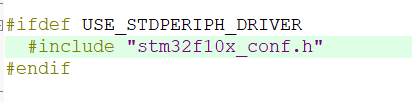
在Define中必须写入这行参数.因为在stm32f10x.h中不写这行参数会导致不能正确引用头文件

智能硬件社区聚焦AI智能硬件技术生态,汇聚嵌入式AI、物联网硬件开发者,打造交流分享平台,同步全国赛事资讯、开展 OPC 核心人才招募,助力技术落地与开发者成长。
更多推荐


 5
5 0
0- 0


 已为社区贡献1条内容

所有评论(0)