蓝桥杯嵌入式-任务调度器
·
注:本篇文章基于蓝桥杯嵌入式-创建项目
一、建立.c.h文件
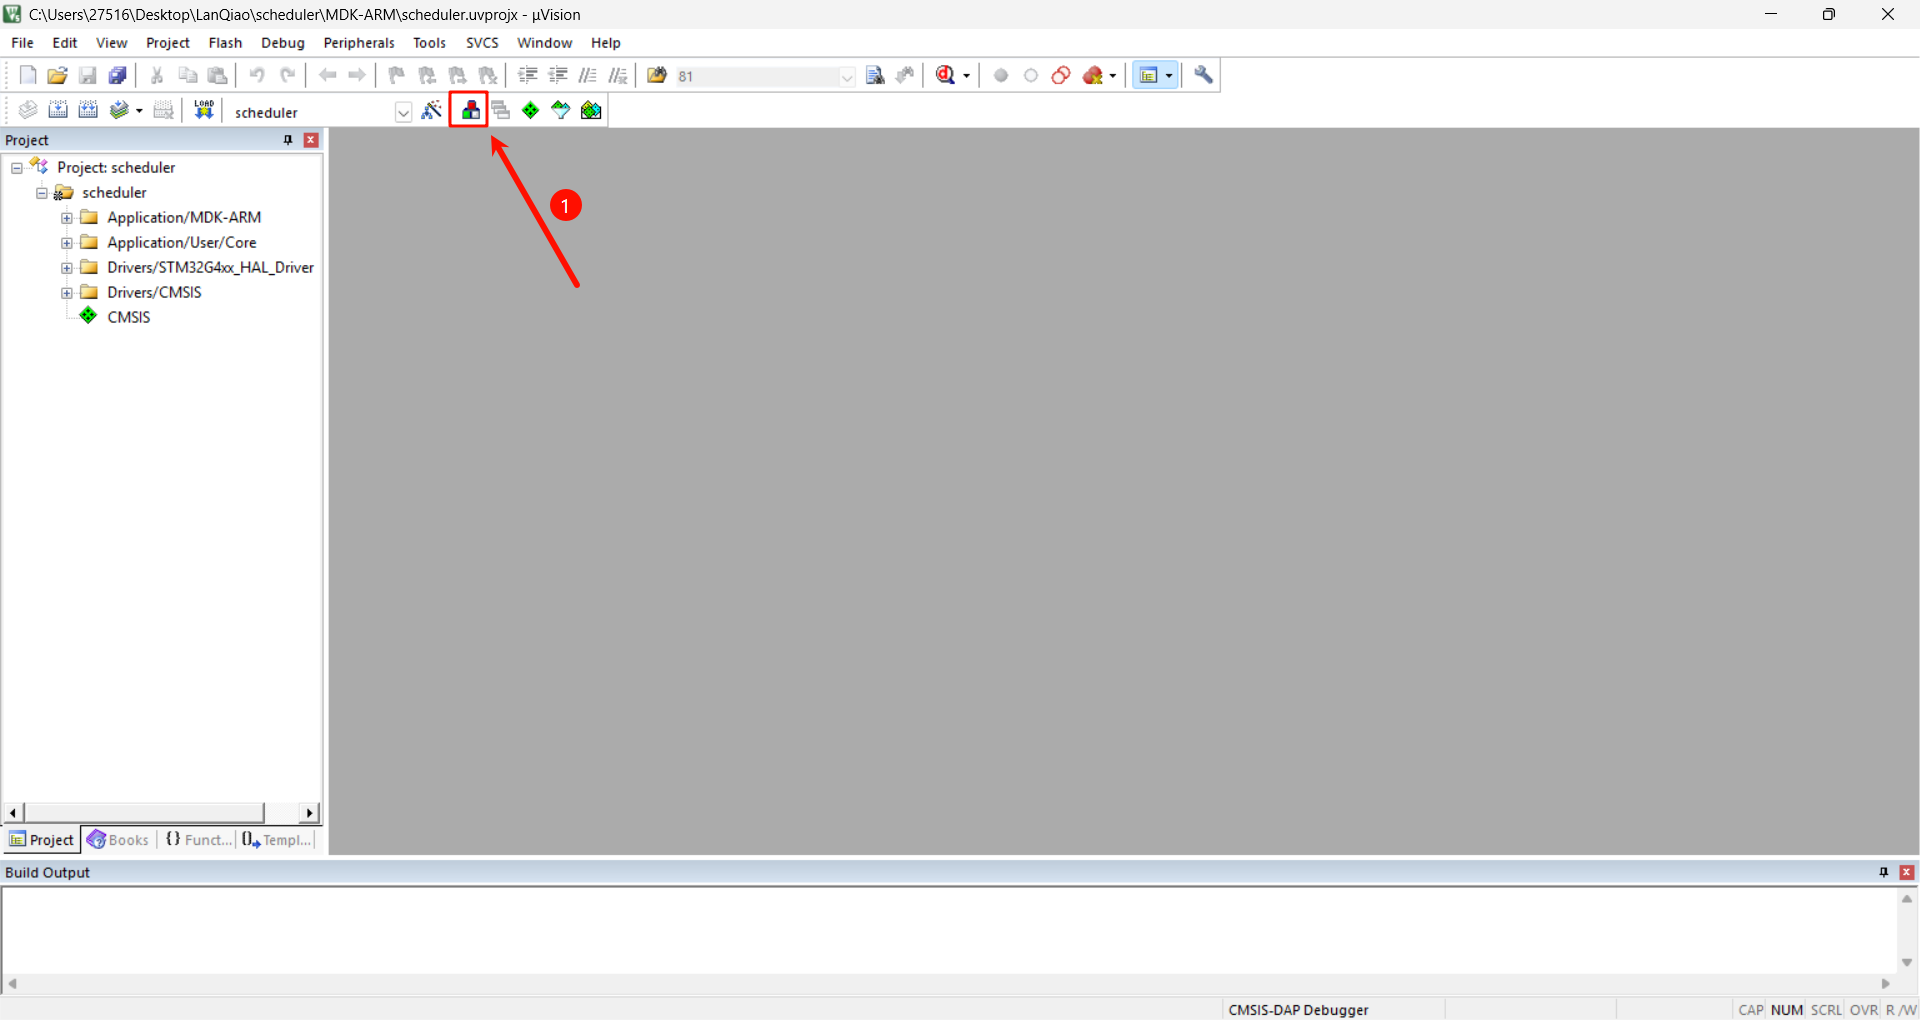
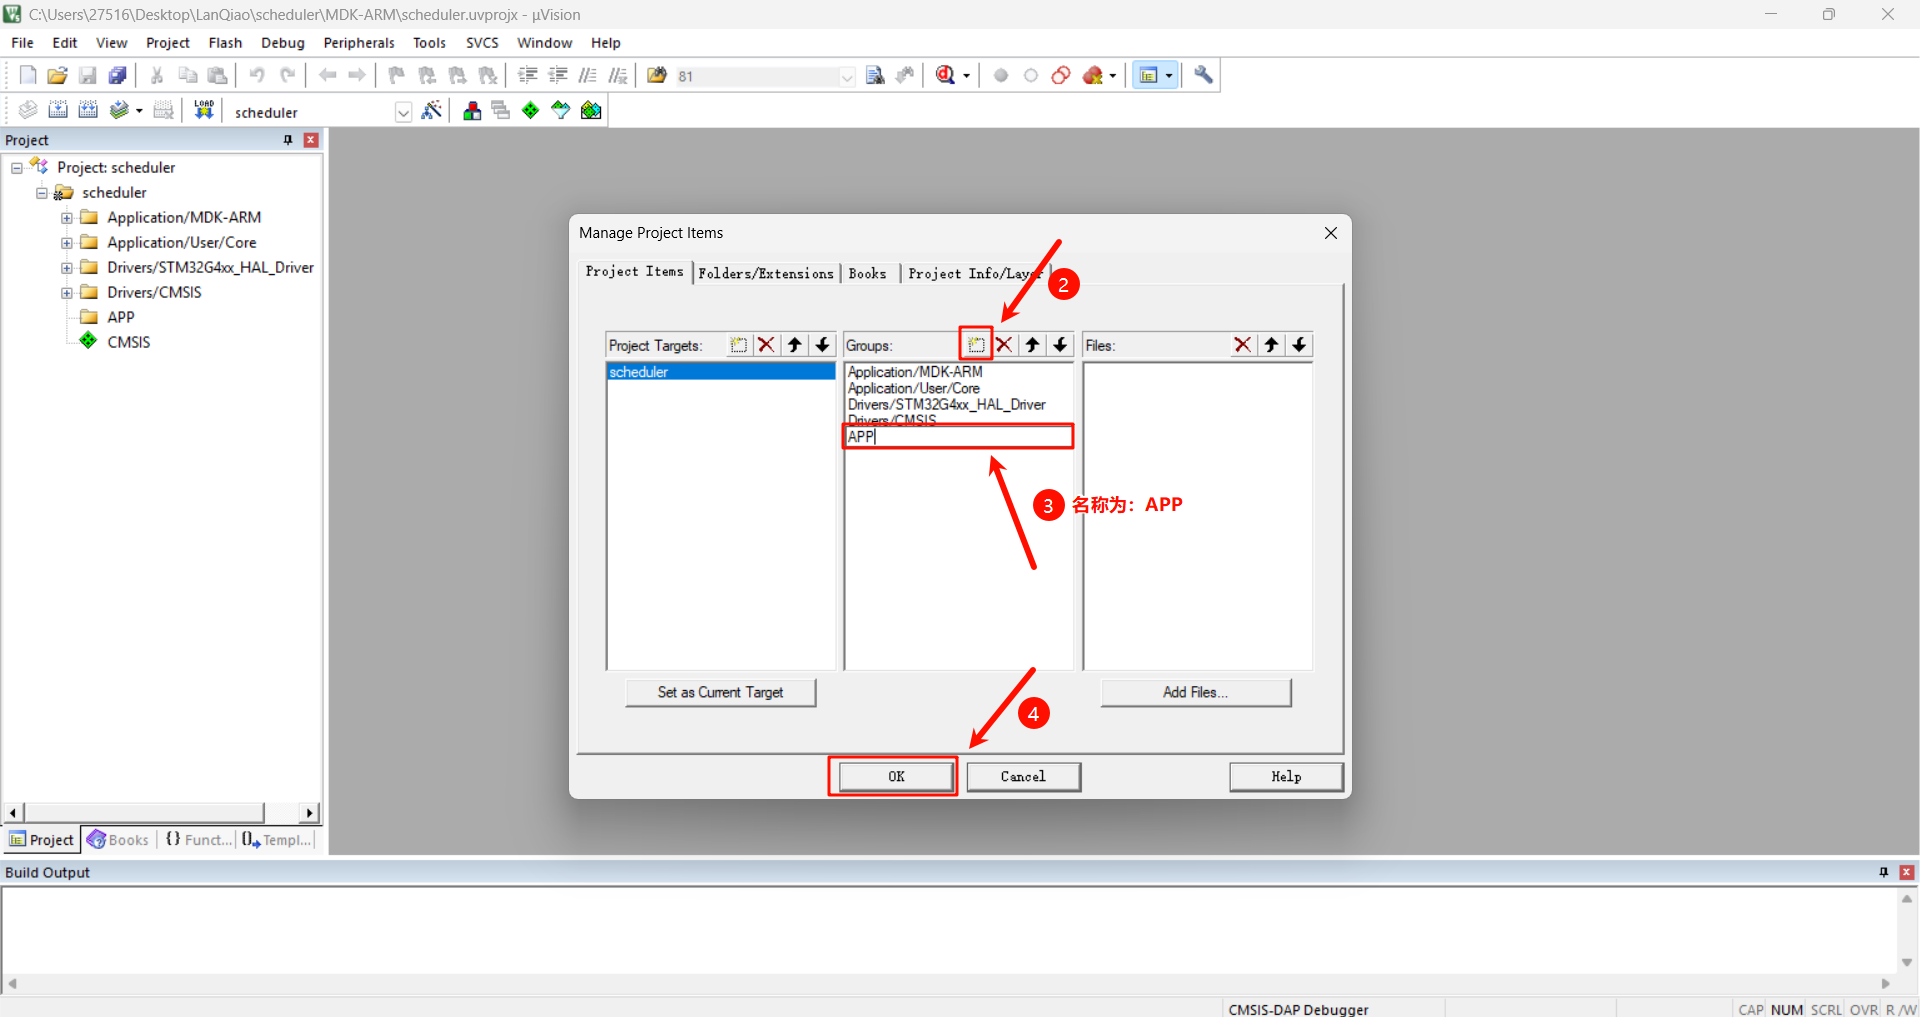
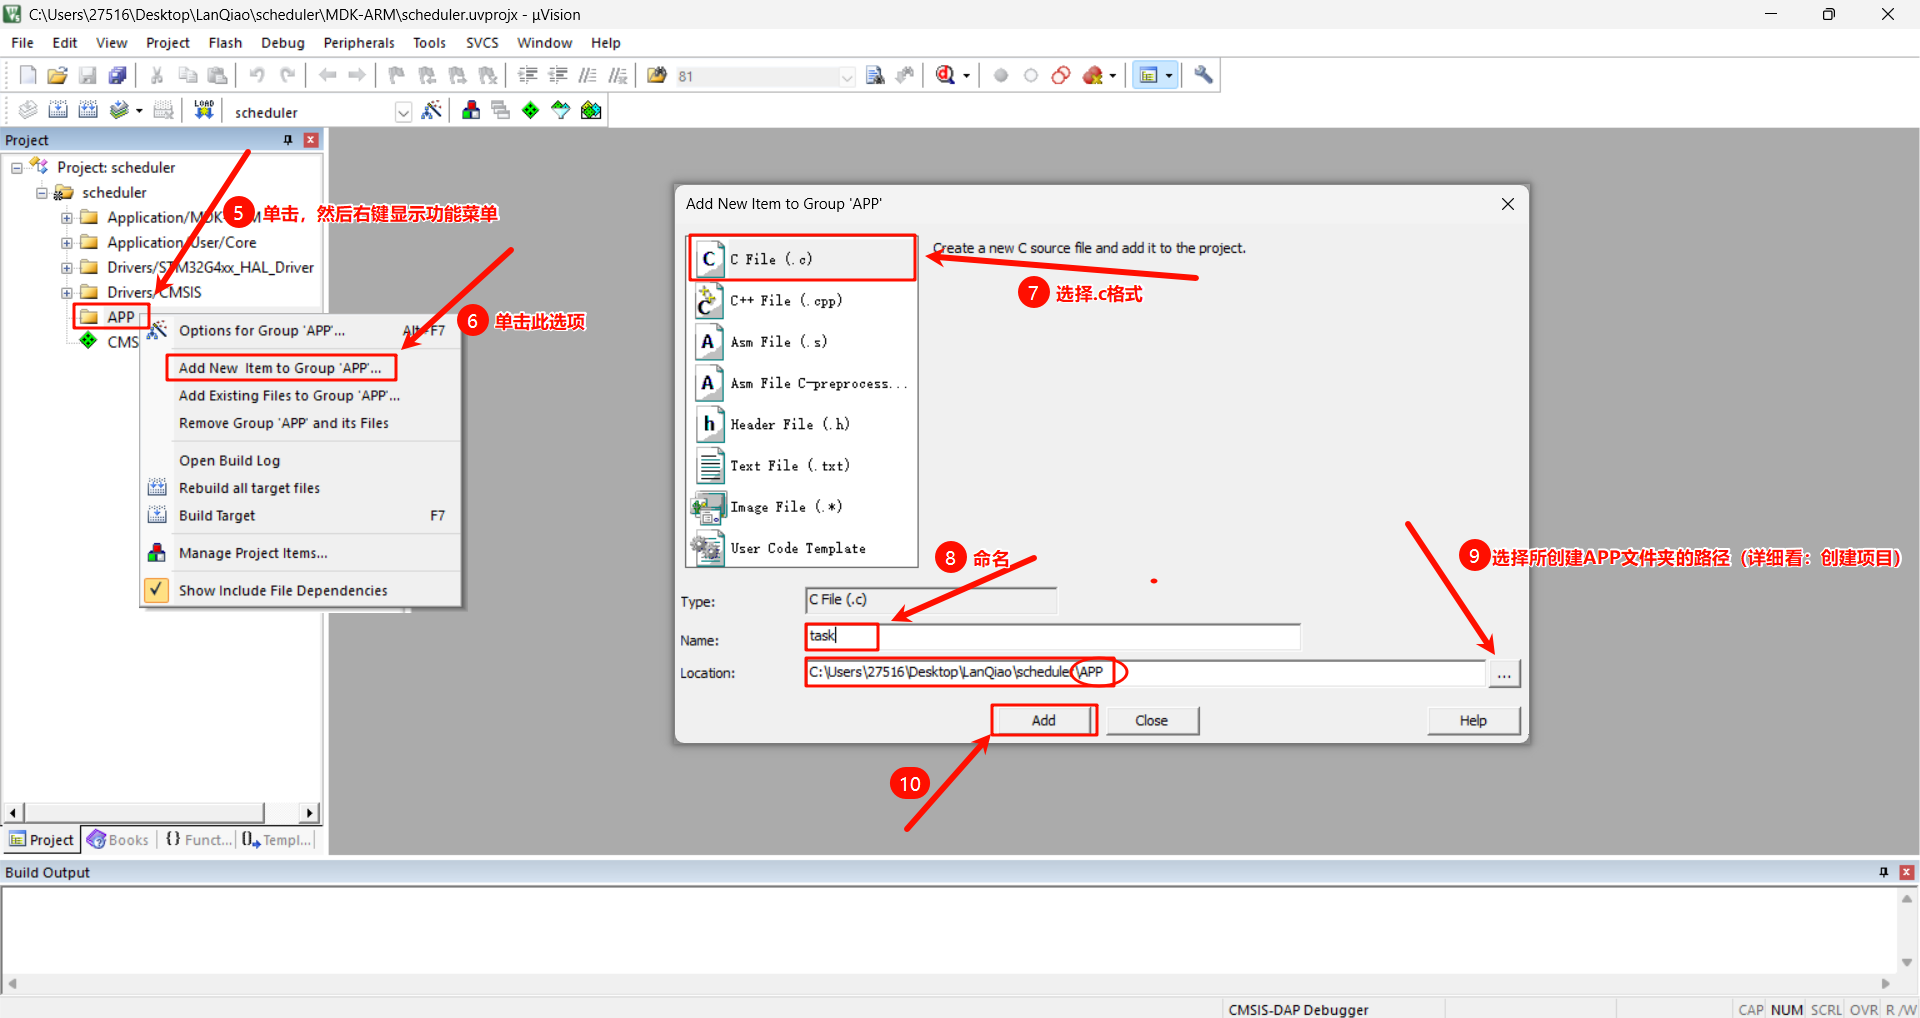
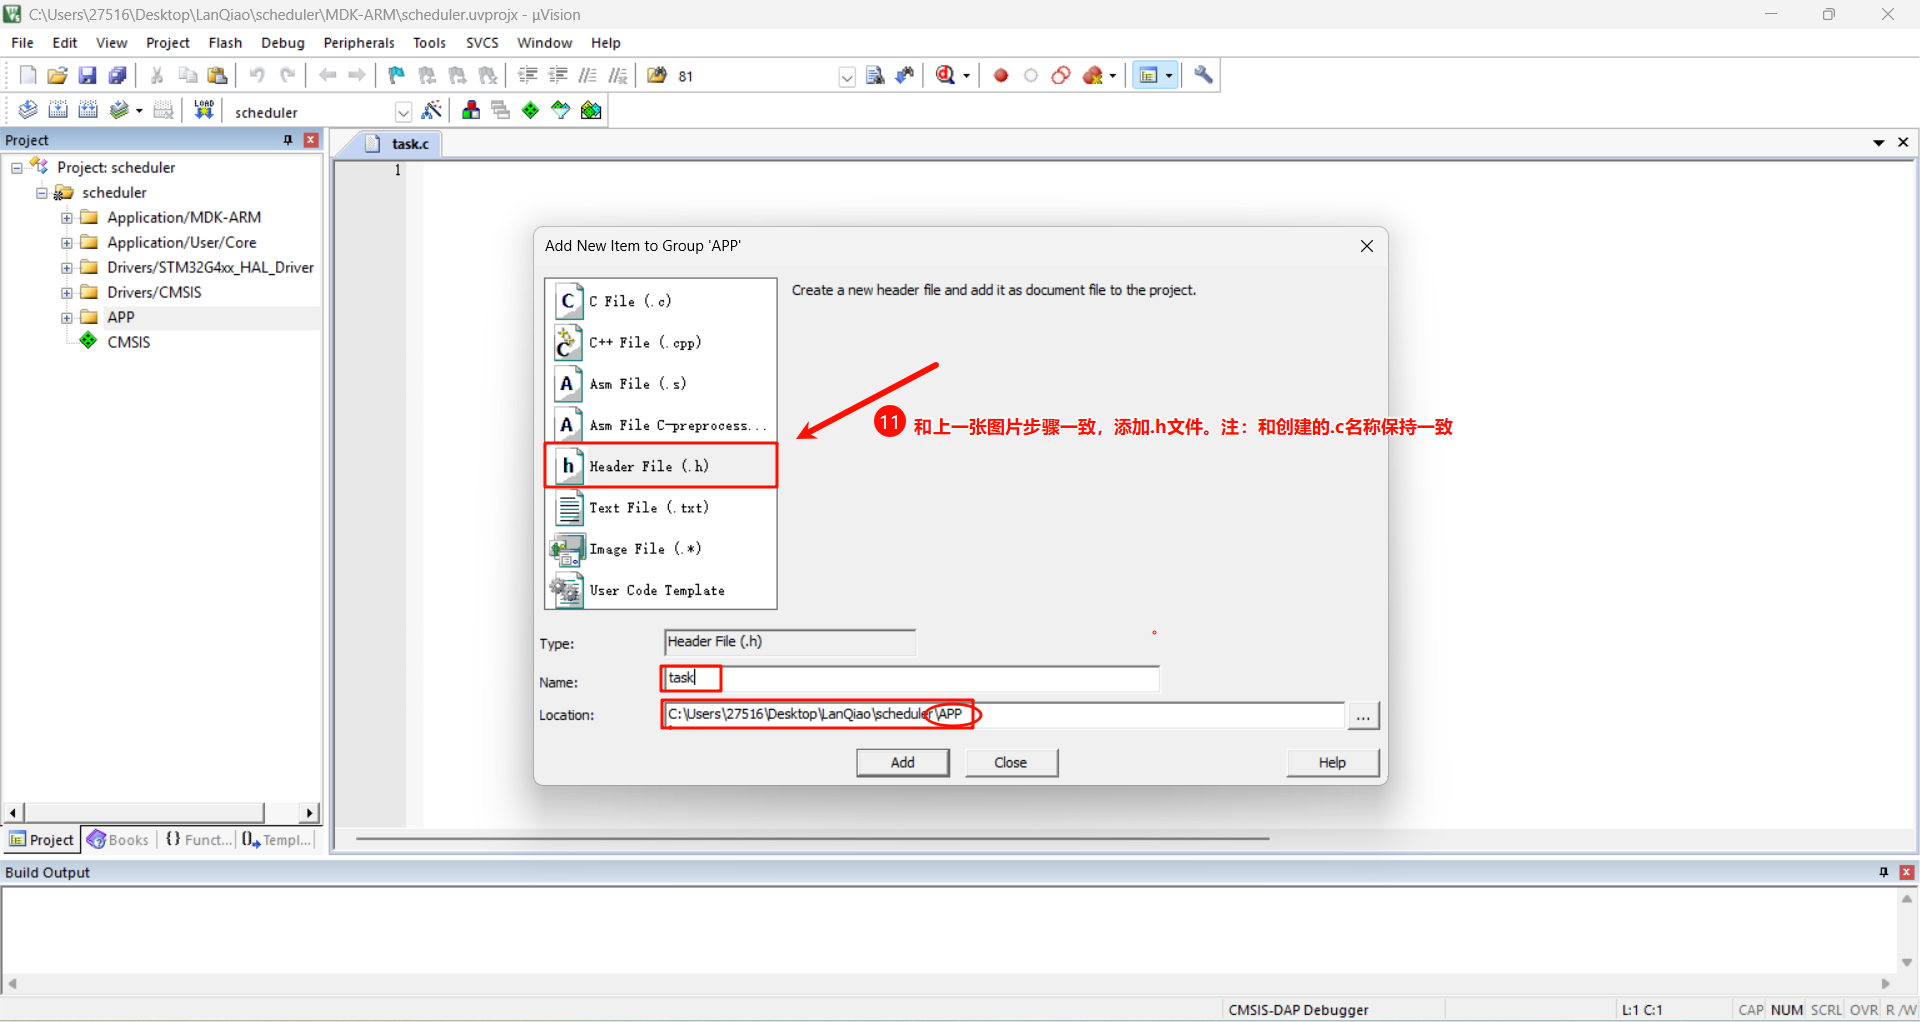
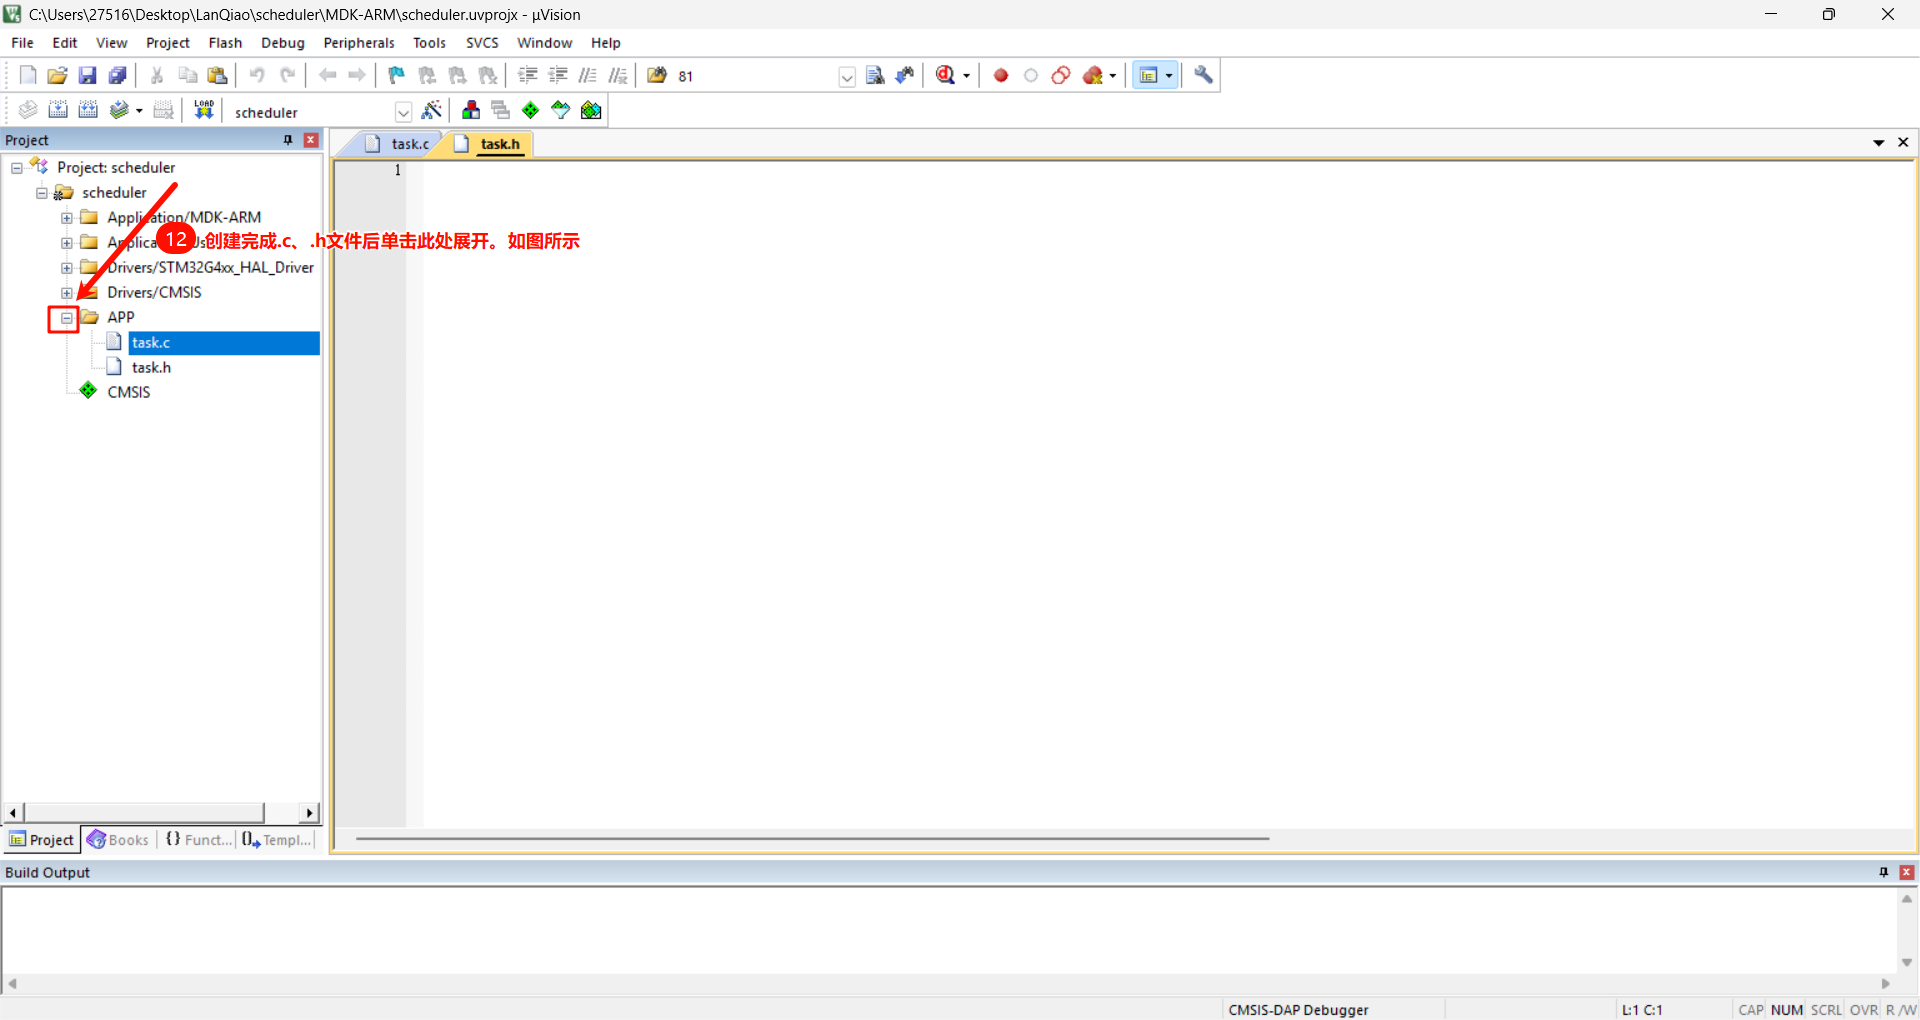
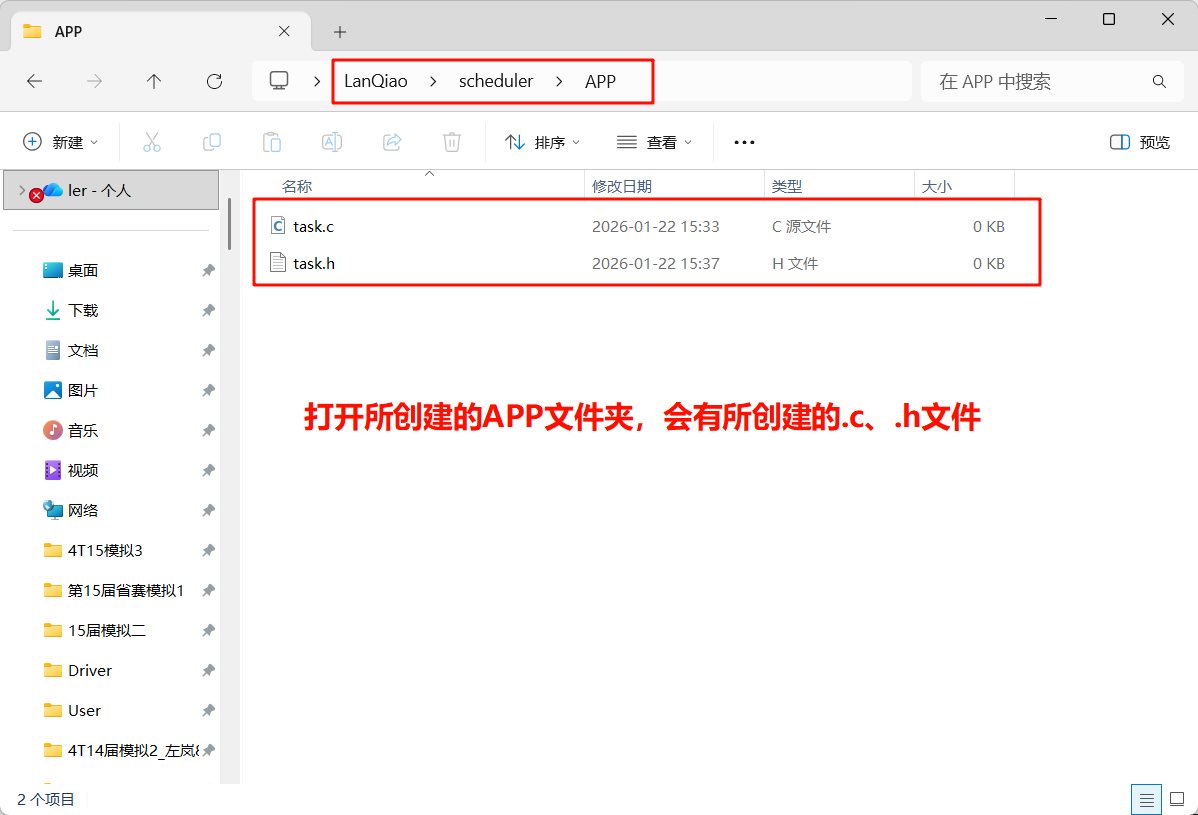
二、补充相关代码
2.1 task.c
2.1.1 修改位置
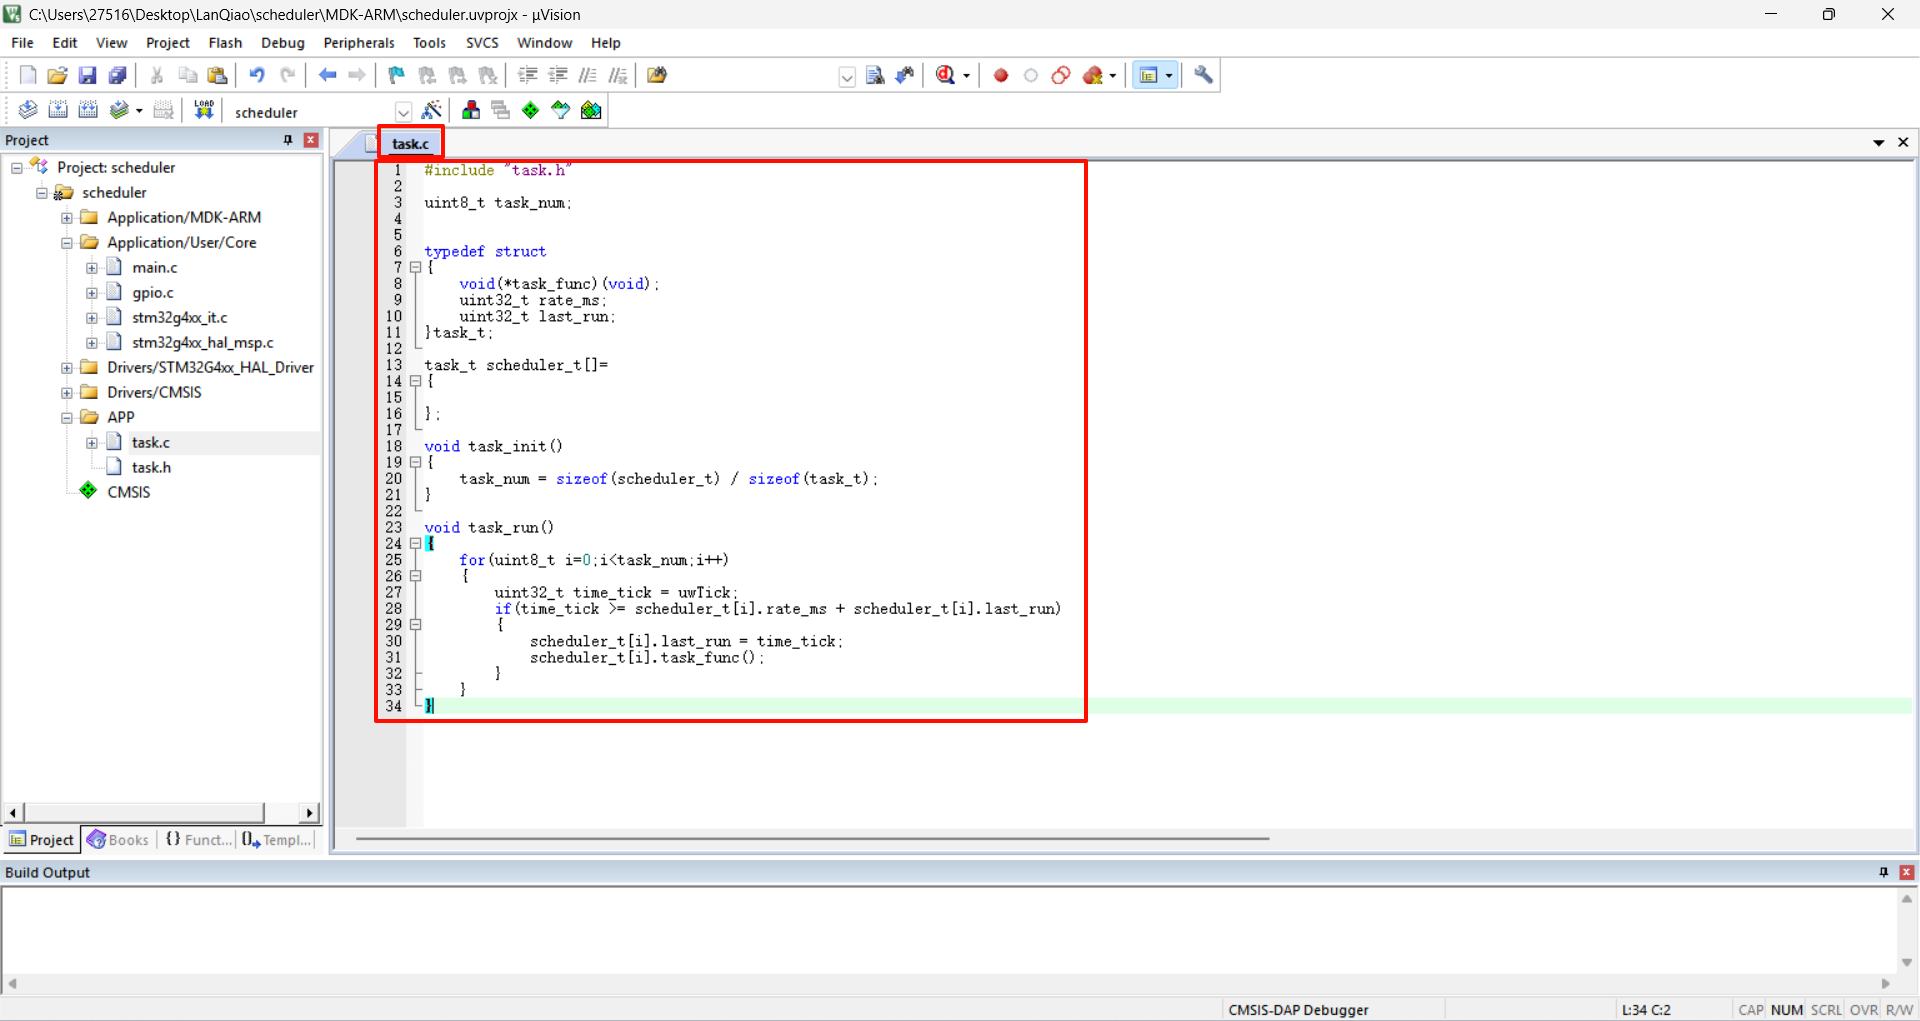
2.1.2 修改代码
#include "task.h"

uint8_t task_num;


typedef struct
{
    void(*task_func)(void);
    uint32_t rate_ms;
    uint32_t last_run;
}task_t;

task_t scheduler_t[]=
{

};

void task_init()
{
    task_num = sizeof(scheduler_t) / sizeof(task_t);
}

void task_run()
{
    for(uint8_t i=0;i<task_num;i++)
    {
        uint32_t time_tick = uwTick;
        if(time_tick >= scheduler_t[i].rate_ms + scheduler_t[i].last_run)
        {
            scheduler_t[i].last_run = time_tick;
            scheduler_t[i].task_func();
        }
    }
}
2.2 task.h
2.2.1 修改位置
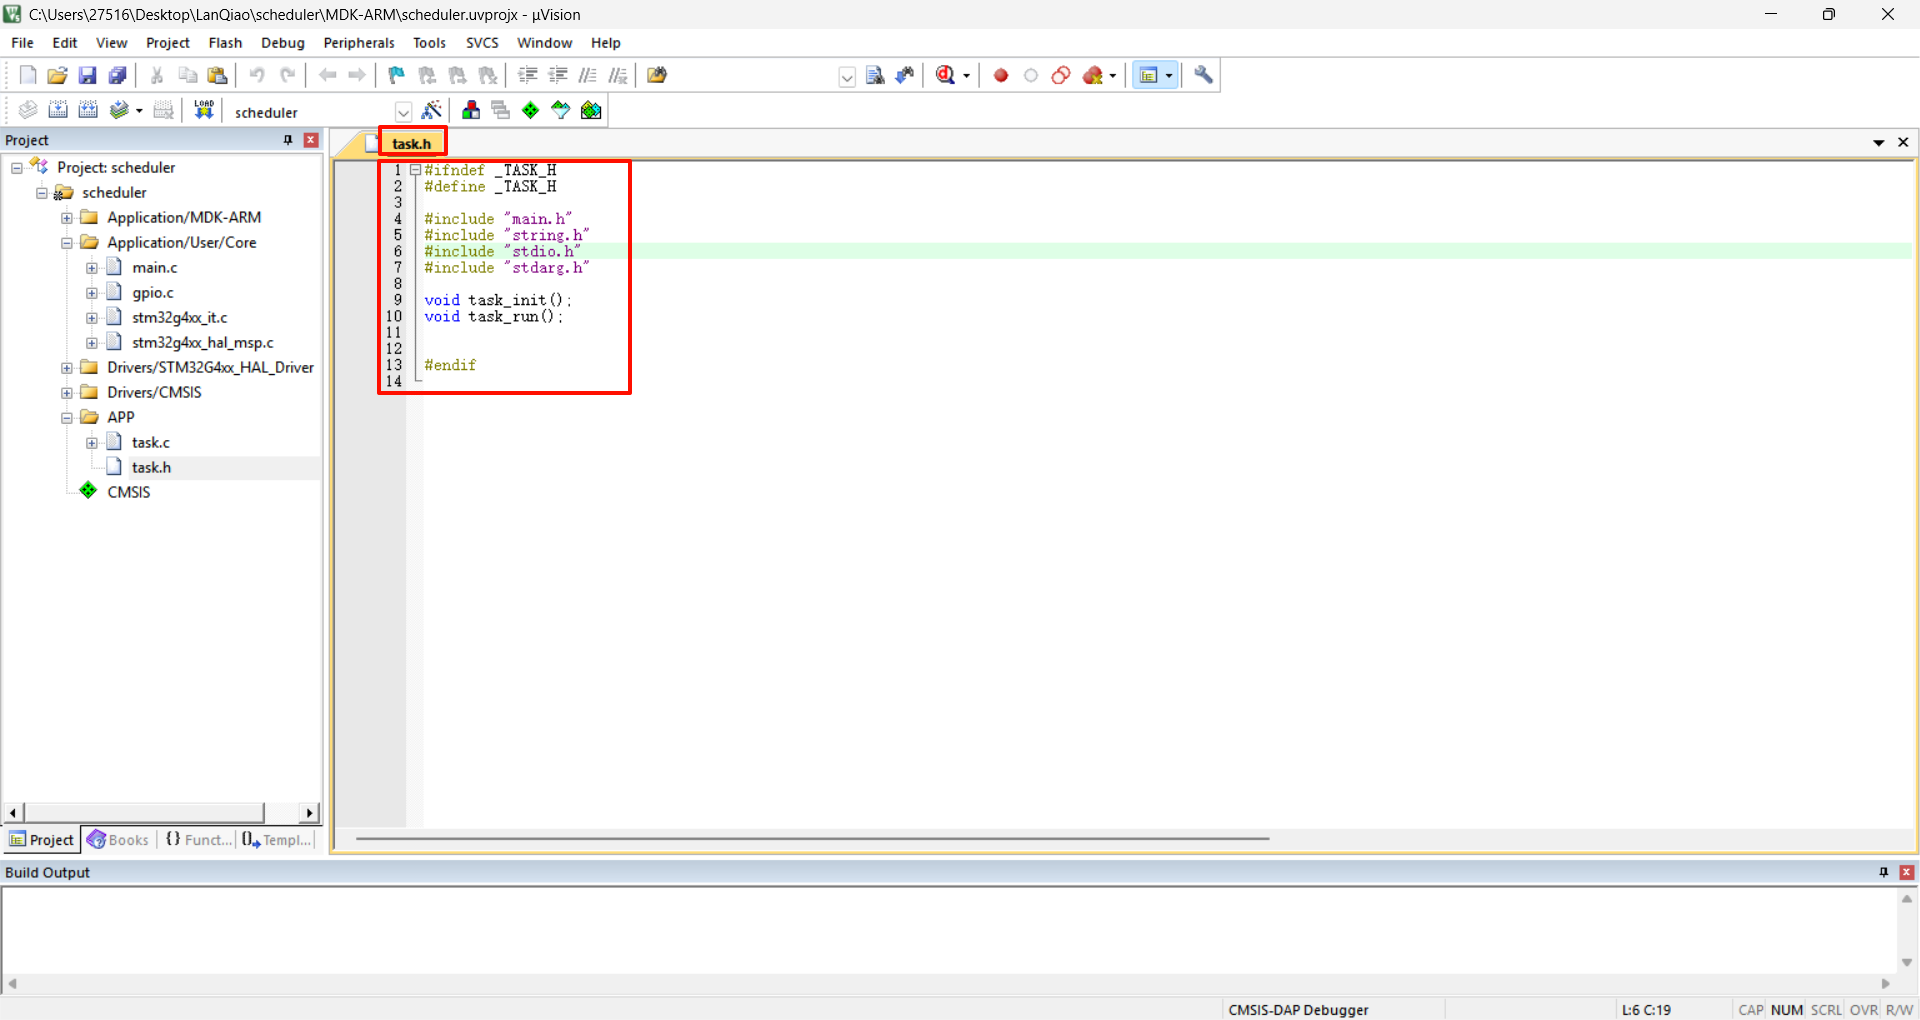
2.2.2 修改代码
#ifndef _TASK_H
#define _TASK_H

#include "main.h"
#include "string.h"
#include "stdio.h"
#include "stdarg.h"

void task_init();
void task_run();

#endif
2.3 main.c
2.3.1 修改位置
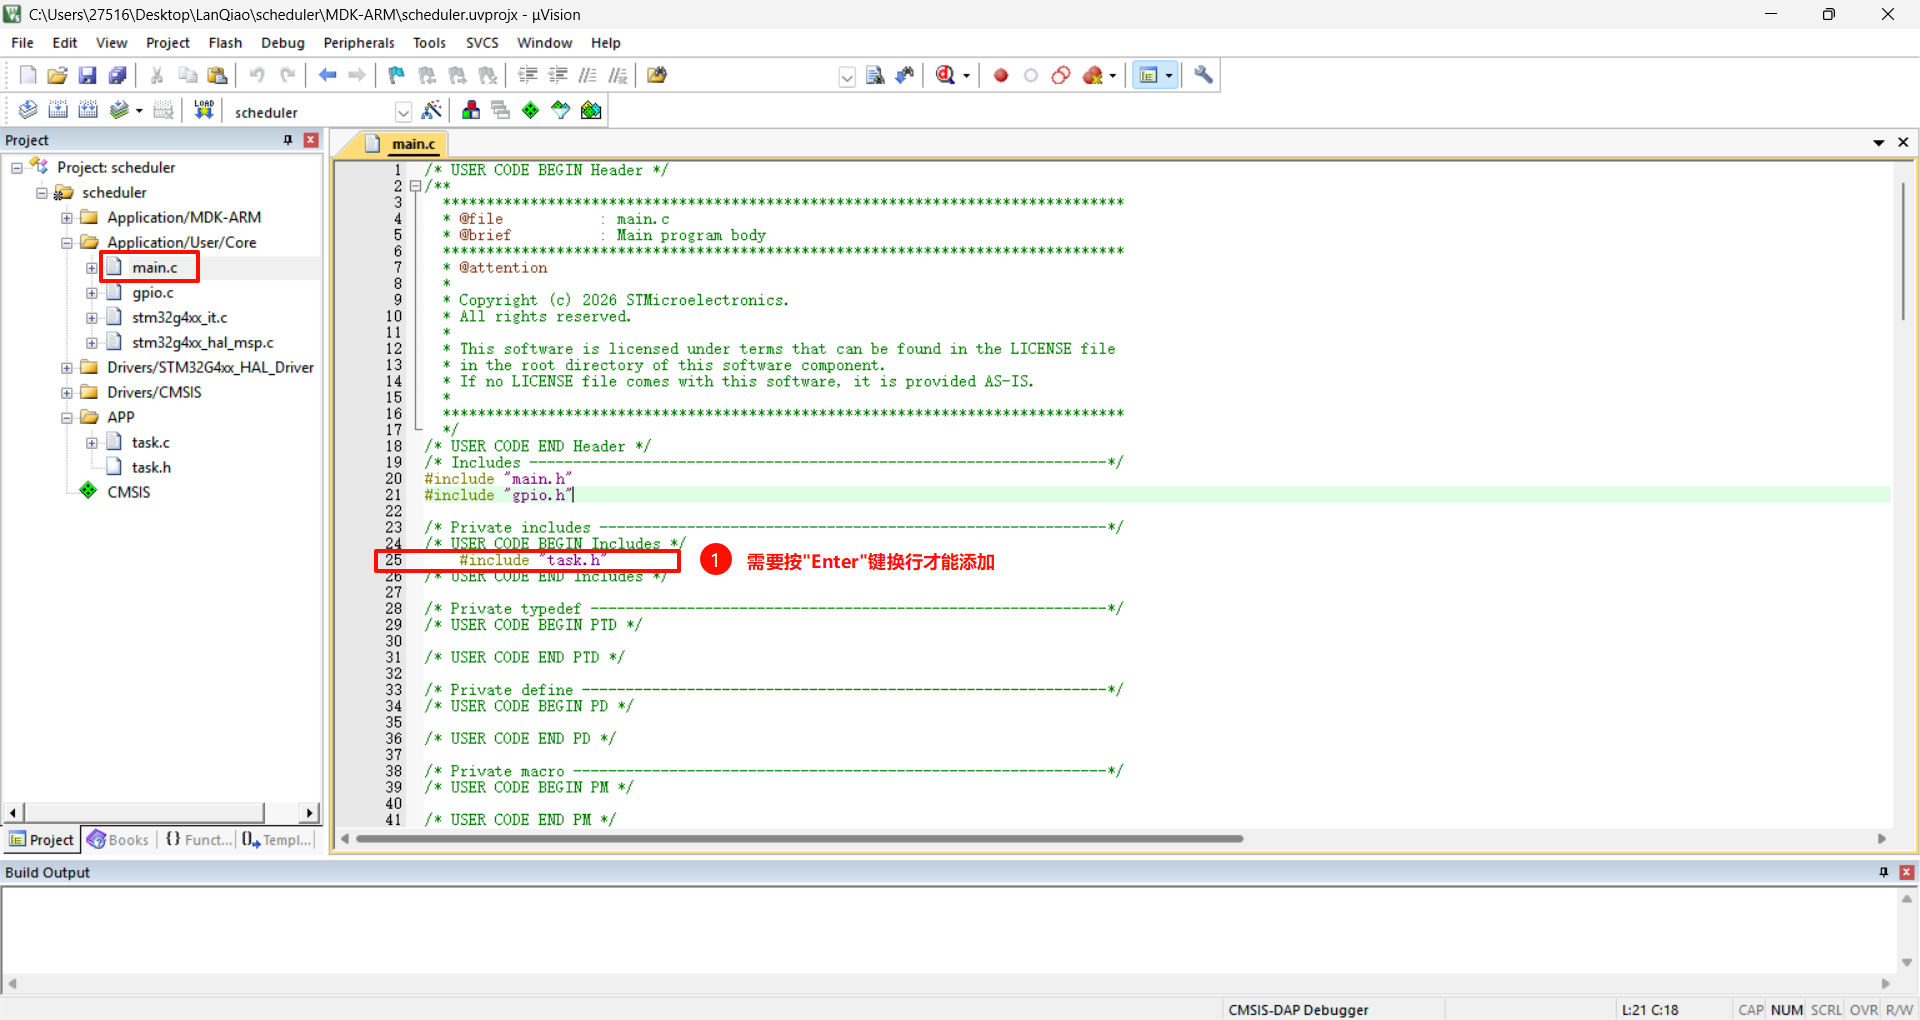
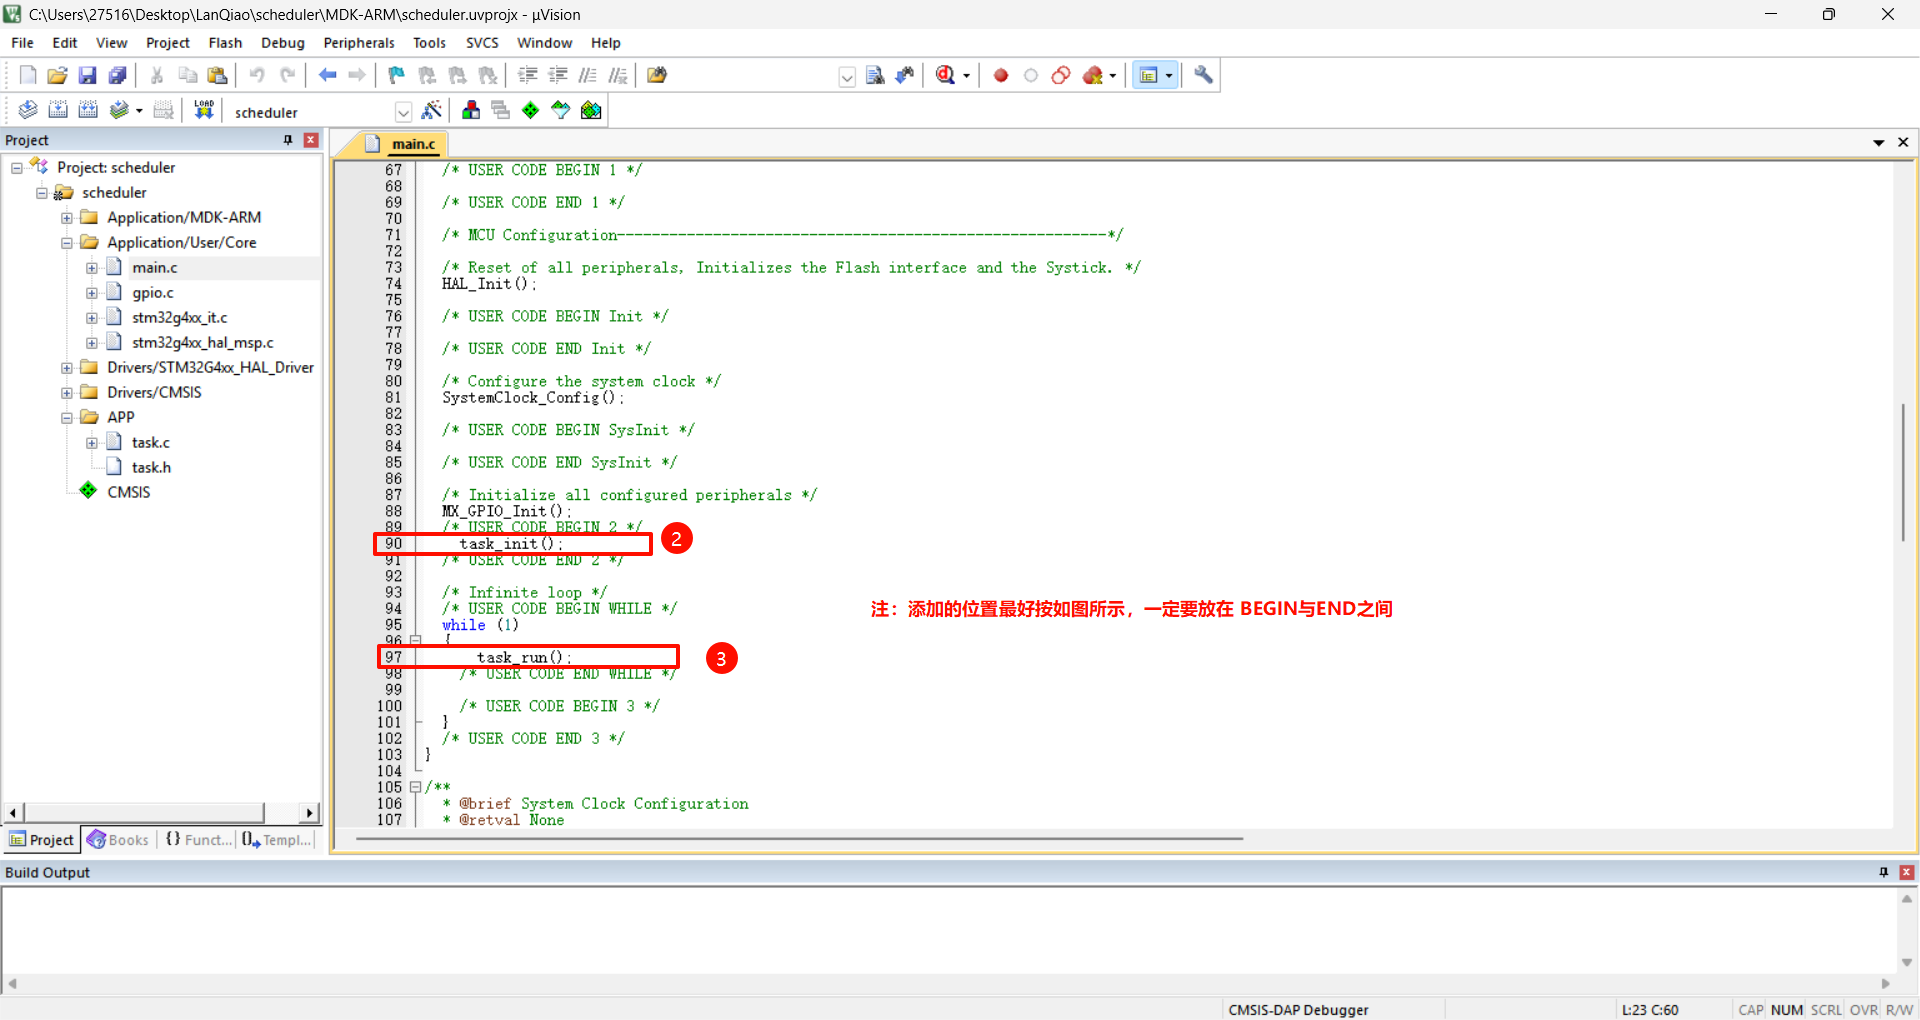
2.3.2 修改代码
#include "task.h" //①

task_init();//②

task_run();//③
三、其他
3.1 提示
注:添加的代码要放在BEGIN和End之间,否则使用STM32CubMX更新配置时,非BEGIN和END之间的代码会丢失。
  /* USER CODE BEGIN 2 */
	task_init();//这就是位于BEGIN和END之间
  /* USER CODE END 2 */

  /* USER CODE BEGIN WHILE */
  while (1)
  {
	  task_run();//这就是位于BEGIN和END之间
    /* USER CODE END WHILE */
3.2 debug调试
注:在没有显示的情况下可以使用keil5内置的调试器来读取相关变量值的变化情况(验证前面的步骤是否有问题,有LCD显示可以用LCD代替)。这步需要使用task.c带注释版本代码。
Debug教程视频(值得学一下):https://b23.tv/OsUBmFv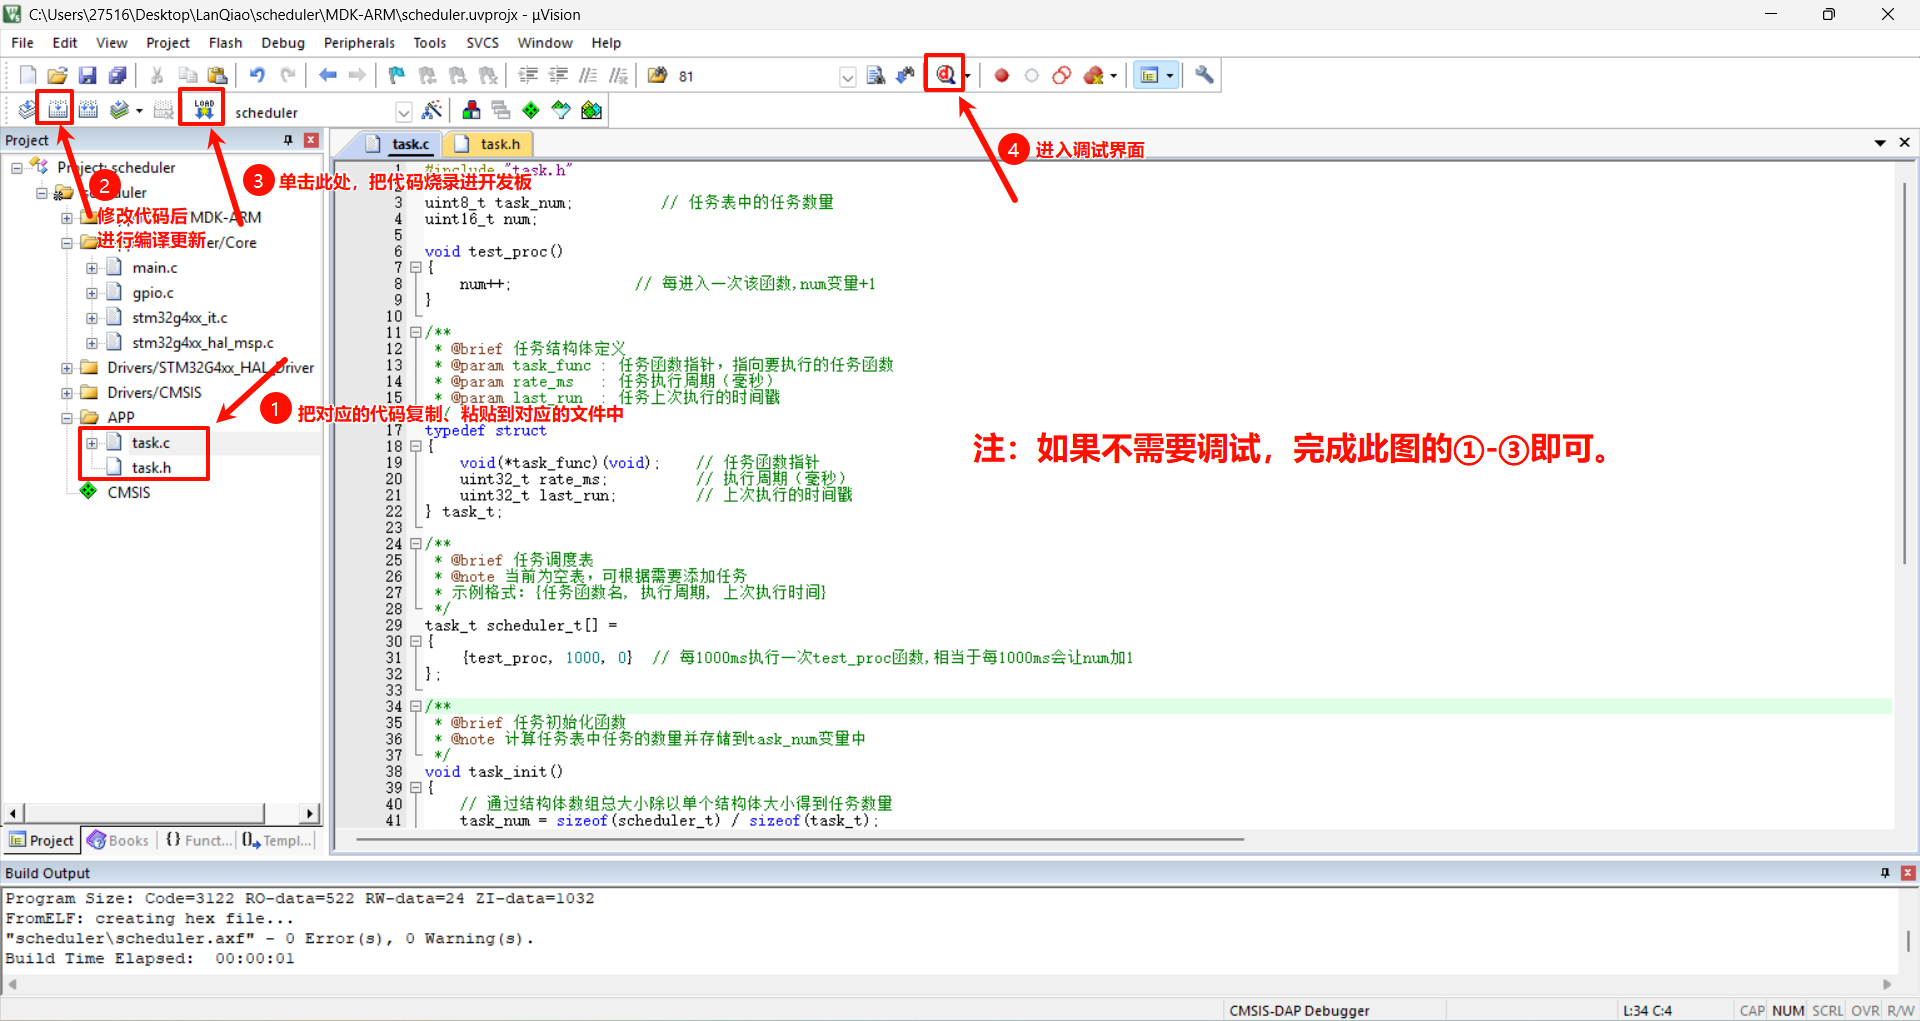
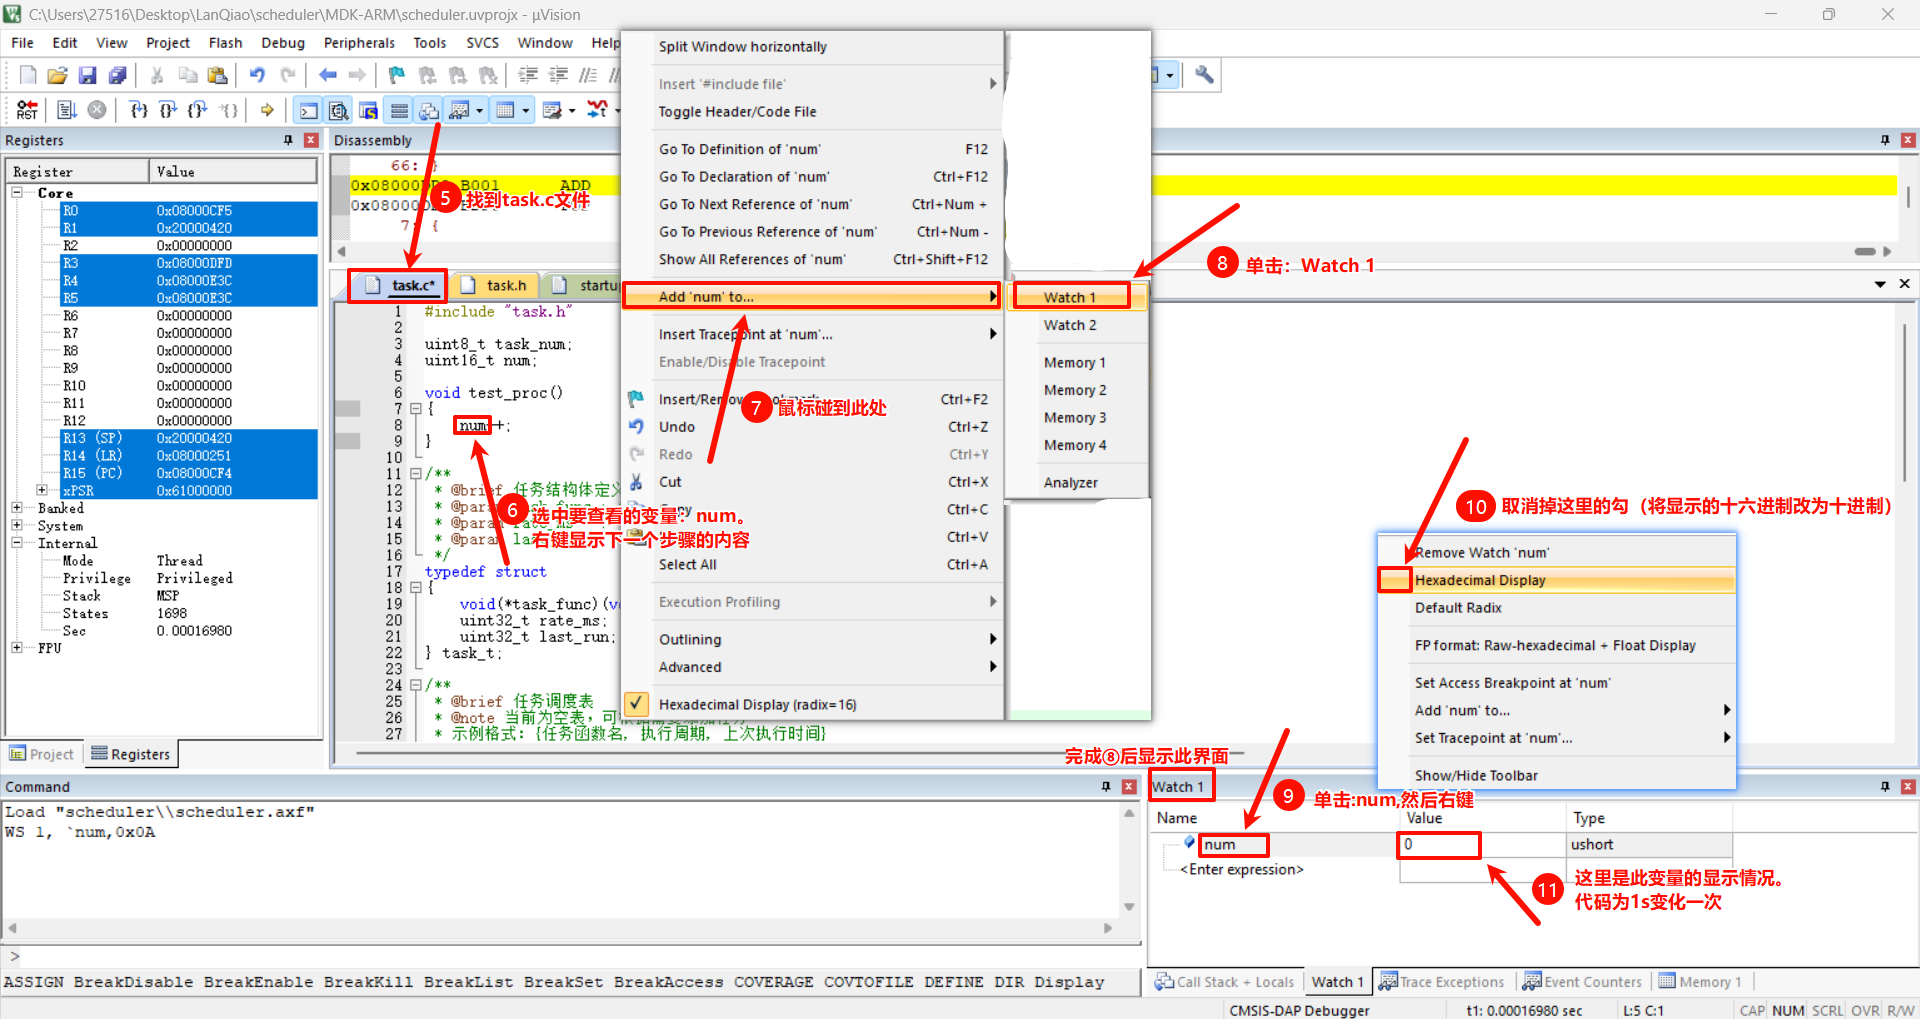
3.3 代码下载
链接:https://pan.quark.cn/s/b6b3d982f73d

智能硬件社区聚焦AI智能硬件技术生态,汇聚嵌入式AI、物联网硬件开发者,打造交流分享平台,同步全国赛事资讯、开展 OPC 核心人才招募,助力技术落地与开发者成长。
更多推荐
 7
7 0
0- 0


 已为社区贡献10条内容

所有评论(0)