archlinux 搭建ESP32开发环境 从0到Hello world
我喜欢使用linux作为开发环境,我常常跟做嵌入式开发的朋友推荐,他总是说,他的开发只能在windows之中进行。
我就很疑惑! 别的芯片我不知道,我刚学的ESP32官方文档中写了,支持linux。那么我今天就尝试用Linux 搭建一下吧。
在linux之中尝试之前我已经在windows搭建过开发环境了,相关文章:
《ESP32 入门 从0到Hello world》
https://blog.csdn.net/lxyoucan/article/details/166937693
开发板选购
我这里选的是ESP32 S3-N16R8,为什么选这个型号呢? 我一个会嵌入式的朋友推荐的。
20多块买的。
安装
依赖包
通过官方文档得知在arch linux之中需要以下依赖包。
Arch Linux
libusb: Includes both runtime and development files for USB access.
libffi: Includes both runtime and development files for Foreign Function Interface.
openssl: Includes both runtime and development files for OpenSSL.
libgcrypt: Runtime library for cryptographic functions (QEMU dependency).
glib: Runtime library for GLib (QEMU dependency).
pixman: Runtime library for pixman (QEMU dependency).
sdl2: Runtime library for SDL2 (QEMU dependency).
libslirp: Runtime library for SLIRP user-mode networking (QEMU dependency).
webkit2gtk-4.1: library needed for rendering the Ui for the GUI not needed for CLI
sudo pacman -S --needed \
  libusb \
  libffi \
  openssl \
  libgcrypt \
  glib2 \
  pixman \
  sdl2 \
  libslirp \
  webkit2gtk-4.1
eim-cli
官方文档之中只介绍了Debian 发行版与RPM 发行版的安装方法,那么在archlinux之中如何安装呢?
我找到了这个:
https://aur.archlinux.org/packages/eim-cli
yay -S eim-cli
从这个名称上可以看出这是个cli程序,但是为什么安装时也看到了下载GUI的包。
保存路径:
/home/itkey/.cache/yay/eim-bin/gui-0.19.0-x64.zip
并且解压以后确实可以正常打开图形化界面。
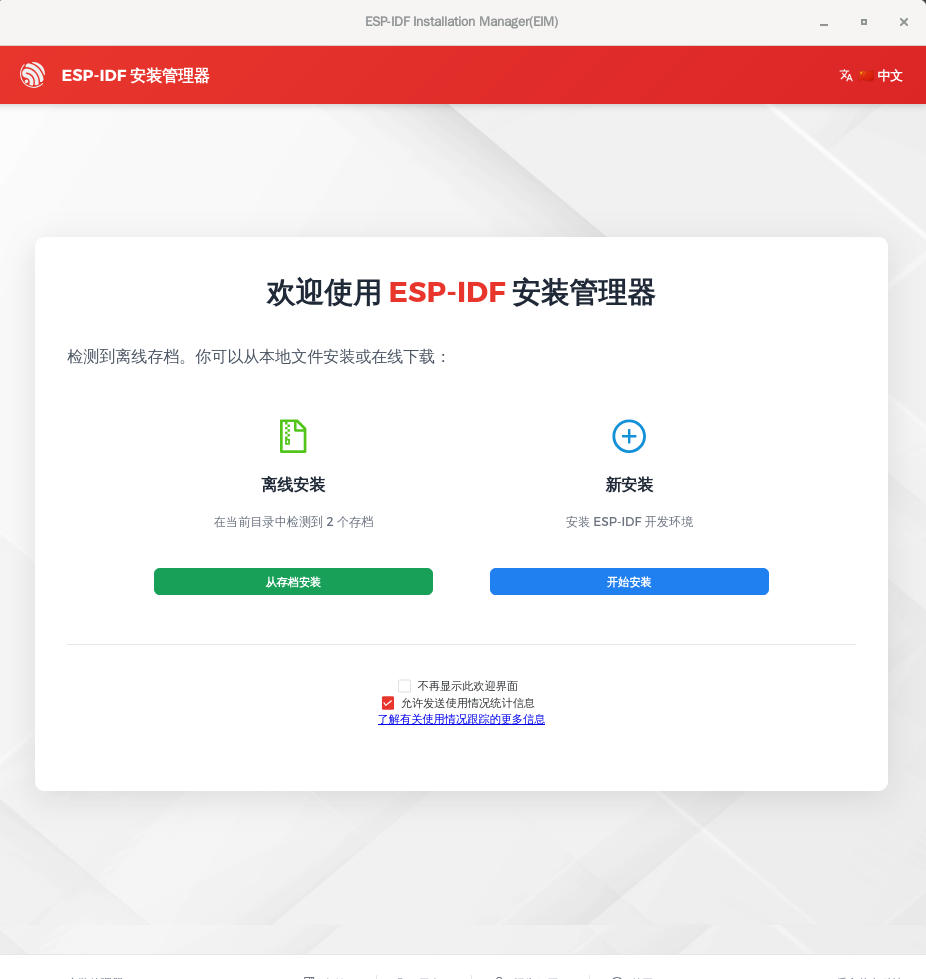
看起来跟windows上的图形化安装界面完全相同。虽然现在有图形化界面了,但是咱不用。都用linux了是不是用一下cli更符合场景呢?
向导模式【失败】
PS:这个模式失败了,所以不用看,仅做了解。
# 向导模式进行安装
eim wizard
显示如下:
eim wizard
2026-10-02 10:06:59 - 10 - 10 - INFO - Running IDF Installer Wizard...
2026-10-02 10:06:59 - 10 - 10 - INFO - Found git: /usr/sbin/git
2026-10-02 10:06:59 - 10 - 10 - INFO - All prerequisites are satisfied!
2026-10-02 10:06:59 - 10 - 10 - INFO - Running python sanity check
⠂ Doing something...                                                                                                2026-10-02 10:06:59 - 10 - 10 - INFO - Found python3
⢀ Doing something...                                                                                                  [PASS] Python Version
  [PASS] pip
  [PASS] venv
  [PASS] Standard Library (json, os, platform)
  [PASS] ctypes
  [PASS] SSL/HTTPS
2026-10-02 10:07:01 - 10 - 10 - INFO - Your Python meets the requirements
? Please select all of the target platforms (ESP chips) ›
⬚ all
⬚ esp32
⬚ esp32c2
⬚ esp32c3
⬚ esp32c5
⬚ esp32c6
⬚ esp32c61
⬚ esp32h2
⬚ esp32p4
⬚ esp32s2
✔ esp32s3
⬚ esp32s31
可以按方向键选择,按空格键操作复选框。回车进入下一步。
我这里取消了默认的all,只选了esp32s3
 Please select the desired ESP-IDF version ›
⬚ v6.1
⬚ v6.0.3
✔ v5.5.5
⬚ v5.4.4
⬚ v5.3.6
⬚ release-v6.1
⬚ release-v6.0
⬚ release-v5.5
⬚ release-v5.4
⬚ release-v5.3
⬚ master
版本选择,我选择了次新版本v5.5.5,追求稳定性和教程与资料相对更多。
? Select the source from which to download ESP-IDF ›
  https://github.com (timeout)
❯ https://git.espressif.com.cn (timeout)
网络选择下面那个带.cn的,我也不知道这里为什么会显示timeout。
? Select a source from which to download tools ›
❯ https://dl.espressif.cn/github_assets (48 ms)
  https://dl.espressif.com/github_assets (216 ms)
  https://github.com (timeout)
? Select a PyPI mirror to download Python packages ›
❯ https://pypi.mirrors.ustc.edu.cn/simple (163 ms)
  https://pypi.tuna.tsinghua.edu.cn/simple (229 ms)
  https://pypi.org/simple (timeout)
  https://mirrors.aliyun.com/pypi/simple (timeout)
? Please select the ESP-IDF installation location (/home/itkey/.espressif) ›
这里我直接回车默认了。
2026-10-02 10:20:02 - 10 - 10 - WARN - Failed to read requirements configuration: HTTP error: error sending request for url (https://git.espressif.com.cn/espressif/esp-idf/raw/v5.5.5/tools/requirements.json). wizard.features.selection_unavailable
Error executing CLI: No features available for selection
失败来的太突然了。哈哈哈哈。我就知道不可能这么顺利的。我尝试多次后放弃了。
自动安装
eim install
它会自动安装,但是这个方法是可行的,并没有报错。至少他在下载。
没想到一次性就成功了,而且这种方式自动安装最新稳定版本。
NOTE: 95 new files downloaded
2026-10-02 10:40:28 - 10 - 10 - INFO - Components registry synchronized successfully
Added environment variable ESP_IDF_VERSION = 6.1
Added environment variable IDF_VERSION = 6.1.0
Added environment variable IDF_TOOLS_PATH = /home/itkey/.espressif/tools
Added environment variable IDF_COMPONENT_LOCAL_STORAGE_URL = file:///home/itkey/.espressif/tools
Added environment variable IDF_PATH = /home/itkey/.espressif/v6.1/esp-idf
Added environment variable ESP_ROM_ELF_DIR = /home/itkey/.espressif/tools/esp-rom-elfs/20241011/
Added environment variable OPENOCD_SCRIPTS = /home/itkey/.espressif/tools/openocd-esp32/v0.12.0-esp32-20260703/openocd-esp32/share/openocd/scripts
Added environment variable IDF_PYTHON_ENV_PATH = /home/itkey/.espressif/tools/python/v6.1/venv
Added environment variable ESP_CLANG_LIBS_PATH = /home/itkey/.espressif/tools/esp-clang-libs/esp-21.1.3_20260408/esp-clang/lib
Added proper directory to PATH
Activated virtual environment at /home/itkey/.espressif/tools/python/v6.1/venv
Environment setup complete for the current shell session.
These changes will be lost when you close this terminal.
You are now using IDF version 6.1.0.
NOTE: No dependencies in idf_extra_components.yml, removing root managed components
2026-10-02 10:40:29 - 10 - 10 - INFO - Required components successfully downloaded
Configuration saved successfully to config.toml
You have successfully installed ESP-IDF
for using the ESP-IDF tools inside the terminal, you will find activation scripts inside the base install folder
sourcing the activation script will setup environment in the current terminal session
============================================
to activate the environment, run the following command in your terminal:
       source "/home/itkey/.espressif/tools/activate_idf_v6.1.sh"
============================================
2026-10-02 10:40:29 - 10 - 10 - INFO - Wizard result: Ok
2026-10-02 10:40:29 - 10 - 10 - INFO - Successfully installed IDF
2026-10-02 10:40:29 - 10 - 10 - INFO - Now you can start using IDF tools
这里一下就成功了,但是其实我想安装次新版本v5.5.5 后面我在研究吧。先试试hello world。
命令行运行hello world
以下目录之中有个示例。
~/.espressif/v6.1/esp-idf/examples/get-started/hello_world
我复制它到
/home/itkey/lansi/workspace/esp/hello_world
cd /home/itkey/lansi/workspace/esp/hello_world
source "/home/itkey/.espressif/tools/activate_idf_v6.1.sh"
# 设置平台
idf.py set-target esp32s3
# 构建
idf.py build
# 烧录
 idf.py flash
我这里到烧录这一步出错了。
ERROR: /dev/ttyACM0 failed to connect: Could not open /dev/ttyACM0, the port is busy or doesn't exist.
([Errno 13] could not open port /dev/ttyACM0: [Errno 13] Permission denied: '/dev/ttyACM0')
查了一下,这个是权限问题。
解决办法:
stat -c '%G' /dev/ttyACM0
如果输出:uucp
把当前用户加入 uucp:
sudo usermod -aG uucp $USER
然后注销当前桌面会话并重新登录,或者直接重启。
这次在重新烧录就成功了。
idf.py flash
看日志:
idf.py monitor
VSCode 运行hello world
安装vscode
sudo pacman -S code
安装插件
- ESP-IDF
- clangd
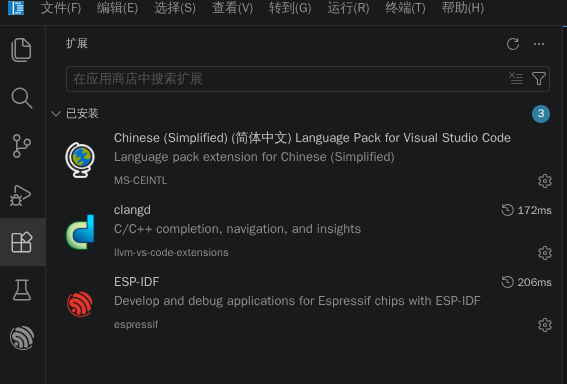
成功运行啦
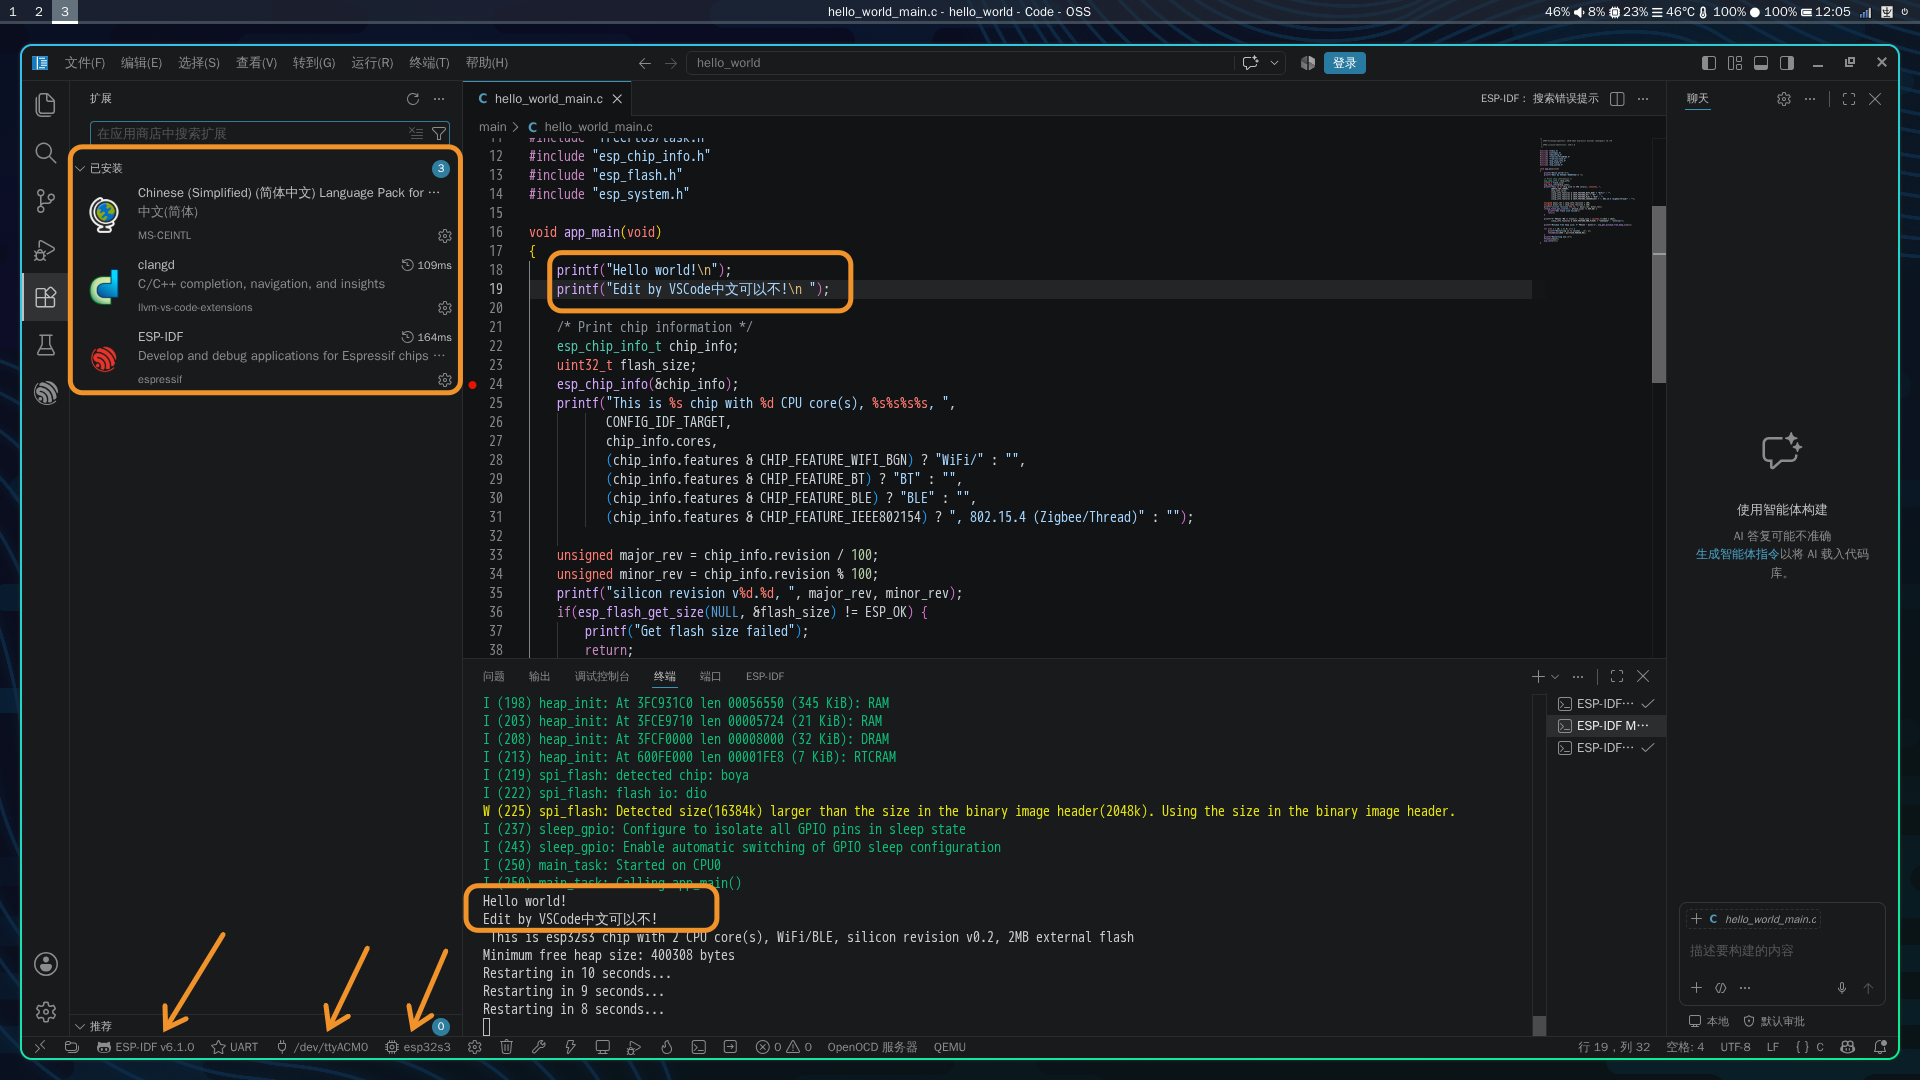
这里要注意的是:
- 插件底部的工具条中设备的配置要设置正确。
- 烧录时弹出的选项,选第2个就可以成功。第1个会有报错不清楚为什么。

总结
用linux做ESP32的开发,感觉也不错啊,而且我感觉好像比在windows上更容易。
参考文档
- 《在 Linux 上安装 ESP-IDF 及工具链》
https://docs.espressif.com/projects/esp-idf/zh_CN/stable/esp32/get-started/linux-setup.html - 《Prerequisites》
https://docs.espressif.com/projects/idf-im-ui/en/latest/prerequisites.html#linux

智能硬件社区聚焦AI智能硬件技术生态,汇聚嵌入式AI、物联网硬件开发者,打造交流分享平台,同步全国赛事资讯、开展 OPC 核心人才招募,助力技术落地与开发者成长。
更多推荐
 5
5 0
0- 0


 已为社区贡献3条内容

所有评论(0)